
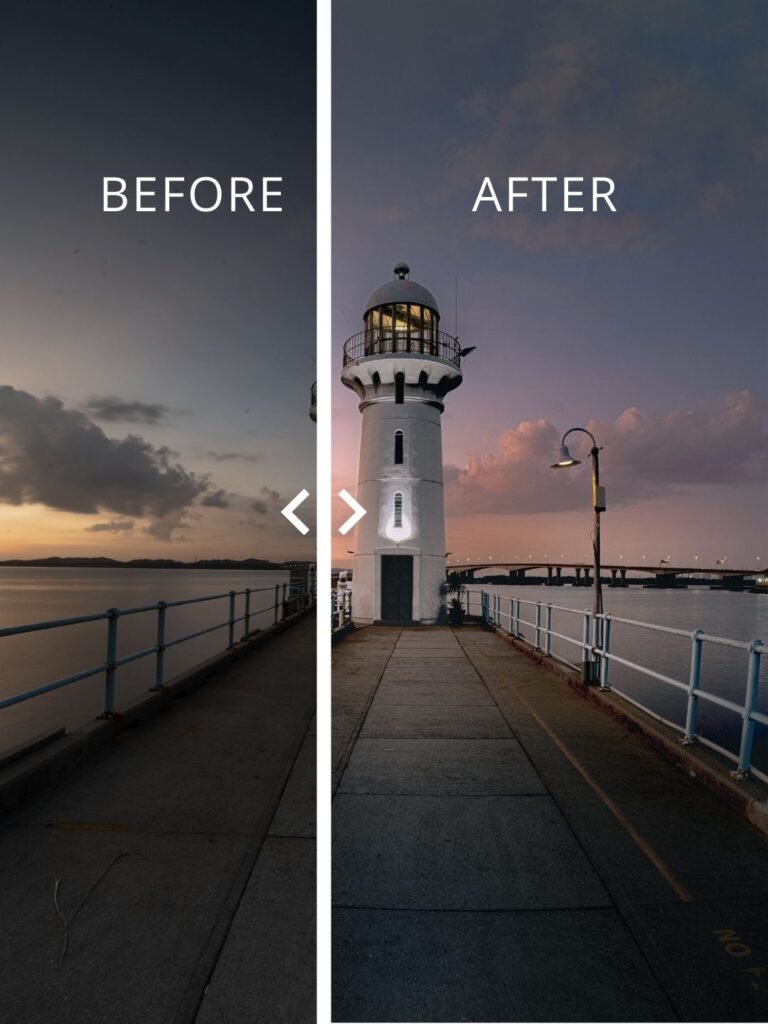
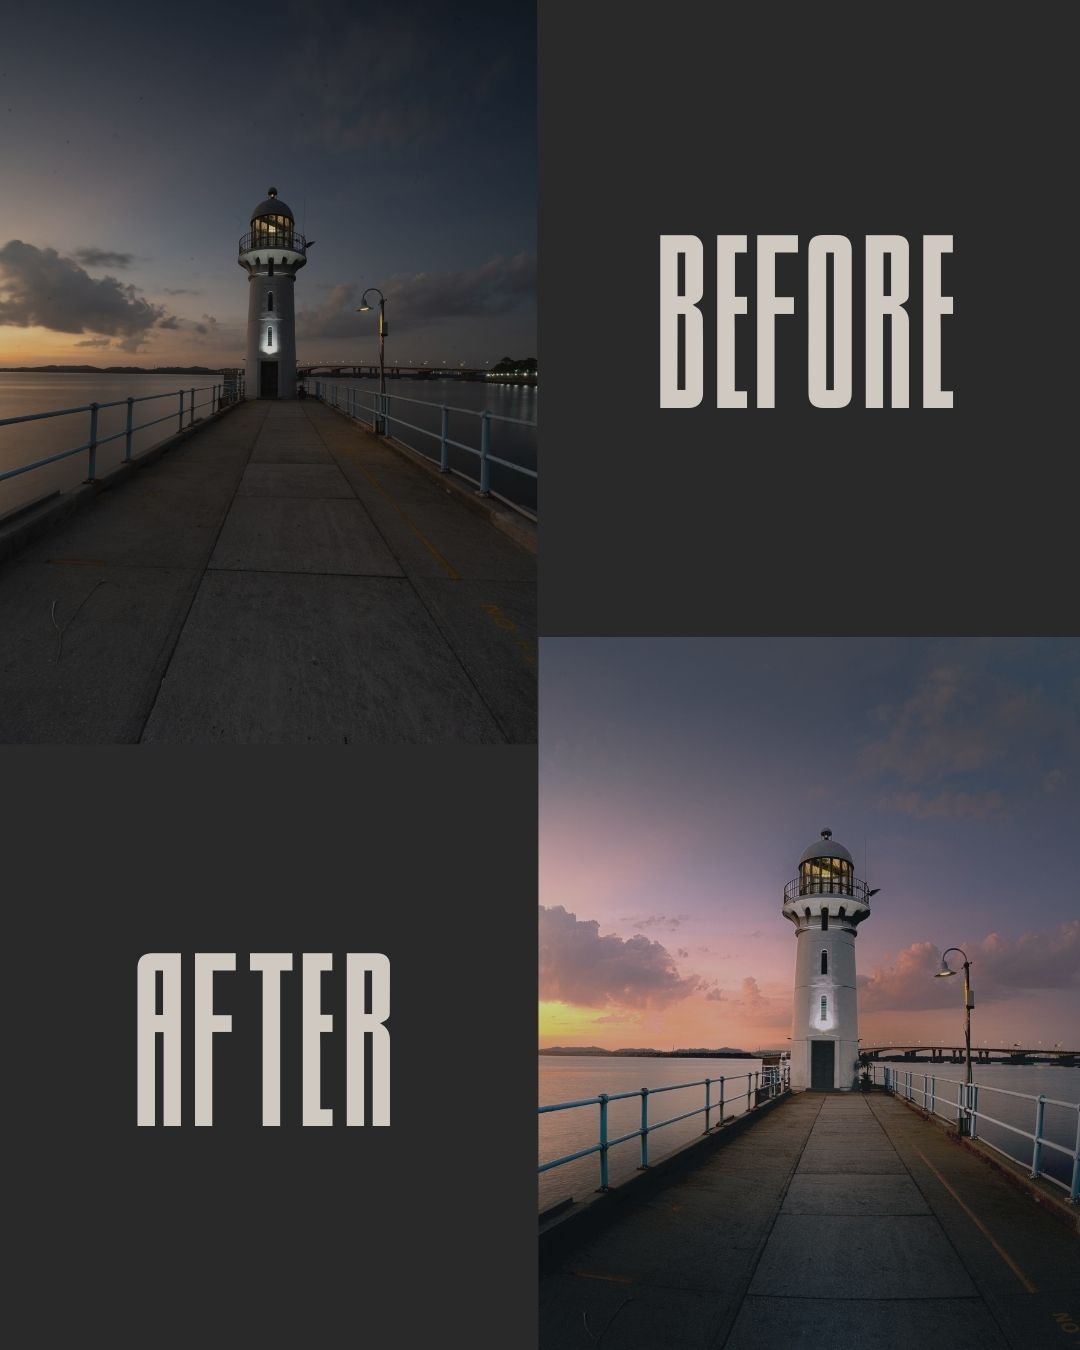
Last Wednesday during our Wednesday photo outing (#60), we photographed the lighthouse at Raffles Marina during sunset.
The sky had beautiful colours, but like many sunset photos, the RAW image looked quite flat and the foreground was darker than the sky.
In this article, I’ll show you how I edited the photo step-by-step in Lightroom Classic to bring out the sunset colours while keeping the lighthouse as the main subject.

 Camera Settings
From the image metadata:
-
Lens: 14mm
-
ISO: 100
-
Aperture: f/22
-
Shutter Speed: 20 sec
-
Tripod: Yes
Using a long exposure helped smooth the water slightly and allowed enough light for the sunset colours.
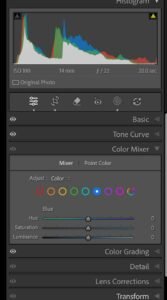
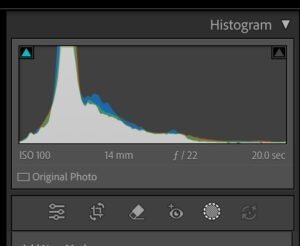
Step 1 – Check the Histogram First
Before touching any sliders, I always look at the histogram.
In this image:
-
Most tones are in the midtones
-
Some shadows in the walkway
-
Bright highlights from the sunset
This tells me the image has good dynamic range, so I only need moderate adjustments.
Step 2 – Global Adjustments (Basic Panel)
I started with the Basic panel to balance the overall exposure.
Typical adjustments included:
-
Slight exposure correction
-
Increase contrast
-
Reduce highlights to protect sunset colours
-
Adjust whites and blacks to add depth
The goal here is simple:
Get a balanced base image before doing any local adjustments.
Step 3 – Adjust the Sky Using a Linear Gradient
Next I added a linear gradient from the top of the frame.
This helps control the sky without affecting the lighthouse.
Typical adjustments for the sky:
-
Slightly reduce exposure
-
Increase contrast
-
Preserve sunset colour tones
This gives the sky a more dramatic look.
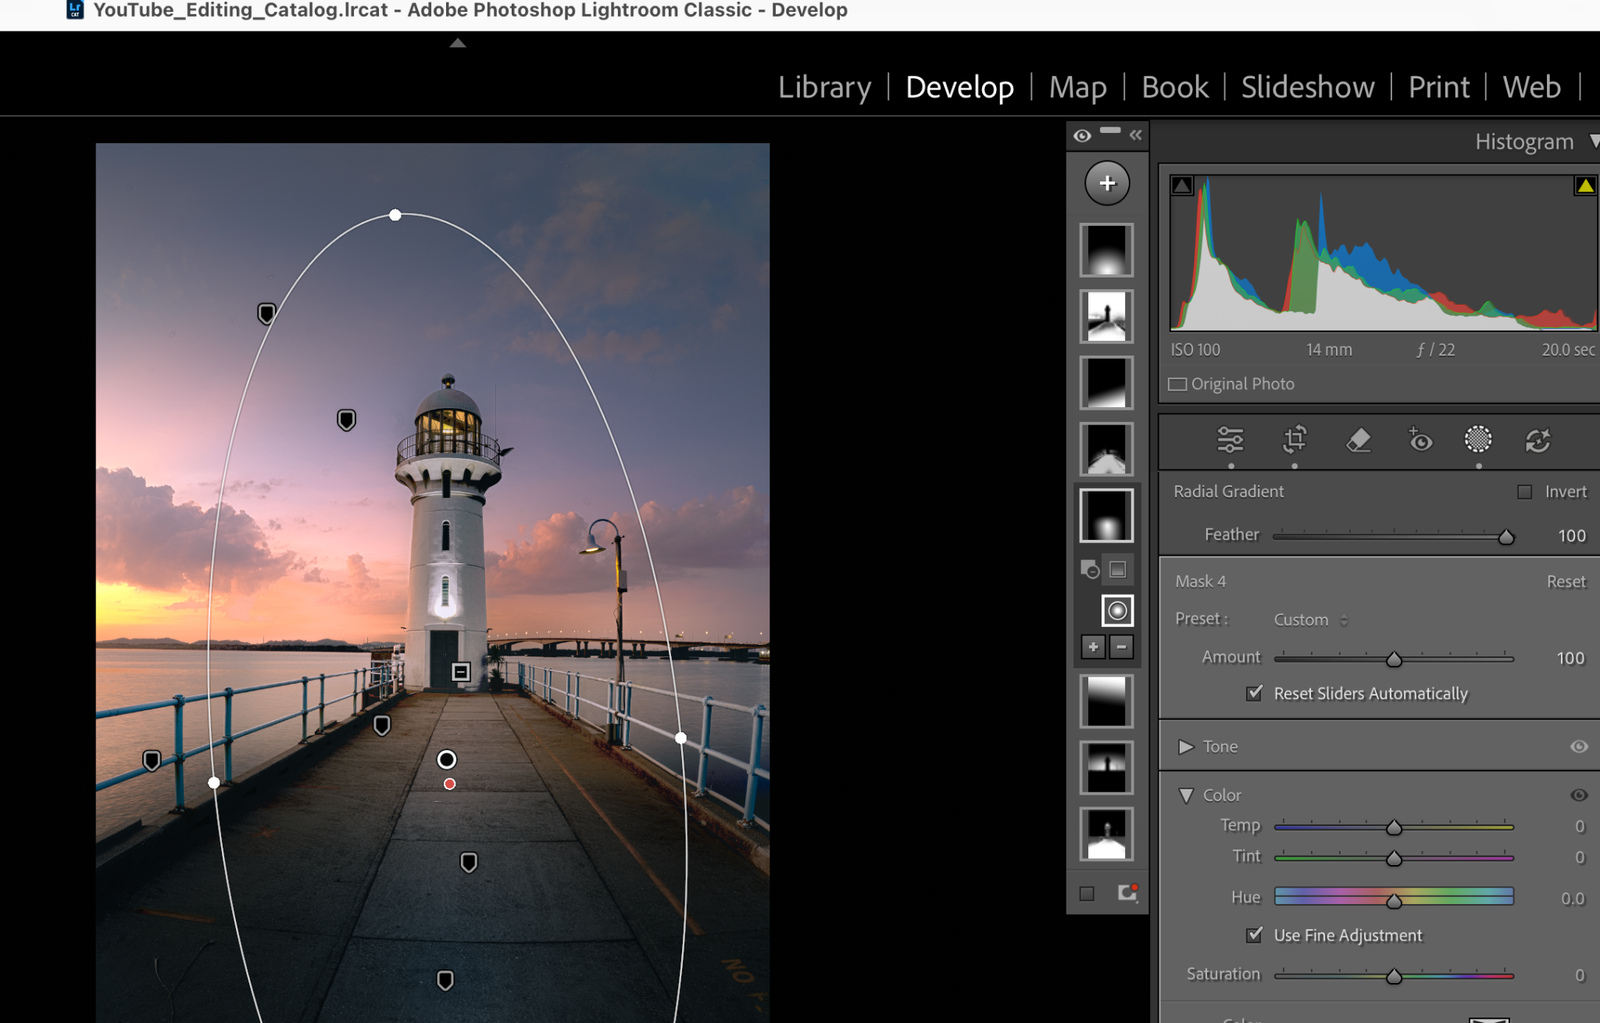
Step 4 – Use a Radial Mask Around the Lighthouse
The lighthouse is the main subject, so I used a radial mask around it.
This subtly brightens the area and draws the viewer’s attention.
Adjustments here are usually small:
-
Slight exposure lift
-
Gentle contrast increase
The idea is not to make it obvious — just enough to guide the viewer’s eye.
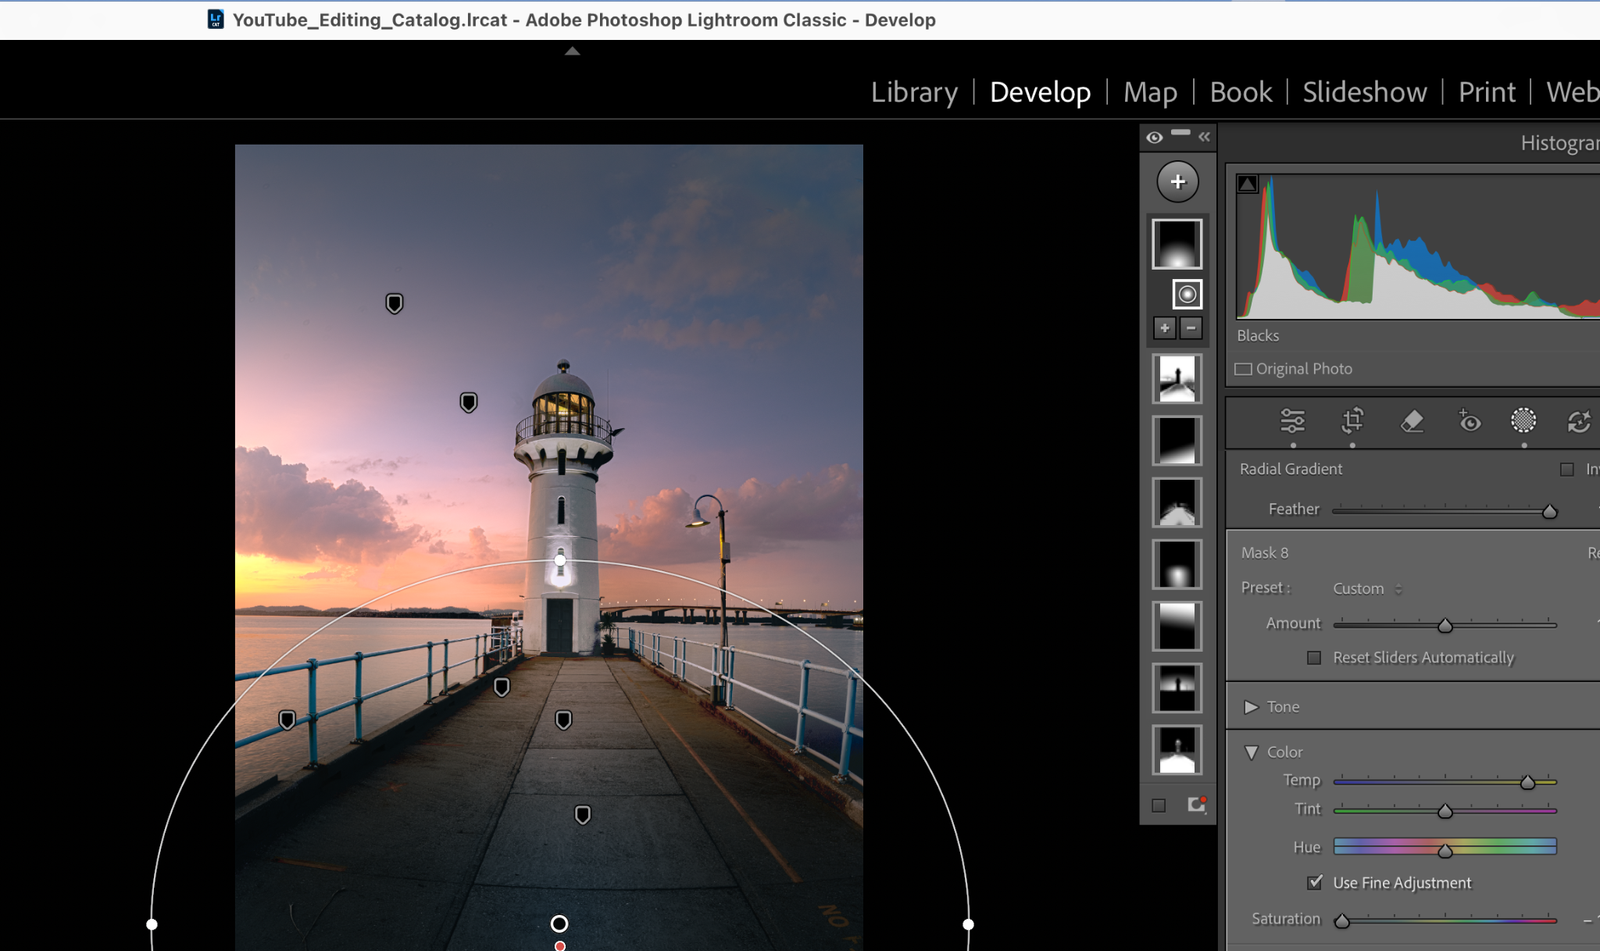
Step 5 – Darken the Walkway
Leading lines are very strong in this composition.
To emphasise them, I added multiple masks along the walkway.
These adjustments help:
-
Darken the edges slightly
-
Guide the eye toward the lighthouse
This technique is similar to a subtle vignette but more controlled.
Step 6 – Brush Adjustments
I used the brush tool for small refinements.
For example:
-
Slight adjustments to the walkway
-
Controlling brightness in small areas
-
Balancing tones between foreground and mid-ground
Brush adjustments are useful for fine control where gradients cannot reach precisely.
Step 7 – Colour Balance
Finally, I checked the colours to make sure the sunset still looked natural.
The goal is:
-
Keep the warm sunset tones
-
Maintain cooler tones in the sky and water
This contrast between warm and cool colours helps the photo feel more dynamic.
The Final Result
After these adjustments, the image now has:
-
Stronger leading lines
-
A brighter lighthouse as the subject
-
Balanced sunset colours
-
Better depth from foreground to background
The edit is actually quite simple, but the key is using multiple subtle masks rather than heavy global edits.
Editing Tip
When editing sunset photos, try to:
-
Start with global adjustments
-
Then refine with local masks
-
Keep adjustments subtle and natural
Small changes applied carefully often produce the best results.
Join Our Next Photo Outing
This photo was taken during our Wednesday photo outing at Raffles Marina.
If you’d like to practise photography together and learn editing techniques like this, you can join our Thursday Zoom photo cooking or upcoming workshops and Wednesday outings:
https://comfortcapture.com/photo-workshops-and-photo-tours/
It’s an easy and simple to follow editing guide, it’s helpful, thanks for sharing your pp tips. Appreciated very much.