
Most landscape photos don’t fail because of bad light.
They fail because of bad metering.
You can have a perfect sunset in front of you and still walk away with a flat image. The camera simply guessed wrong.
This is where understanding metering changes everything.
Why metering matters more than you think
Your camera does not see beauty.
It sees light and tries to average it into middle grey.
So when you point it at a dramatic scene, it often does this:
- bright skies become dull
- shadows become washed out
- contrast disappears
If you rely on default settings, you lose the very thing that made you stop and shoot.
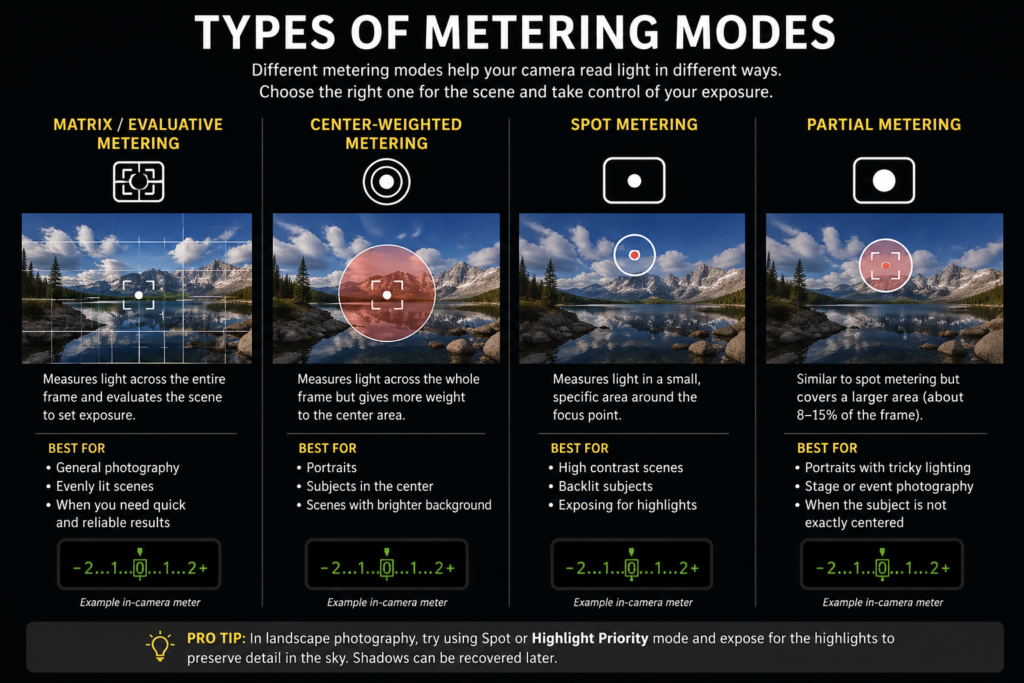
The four metering modes explained simply
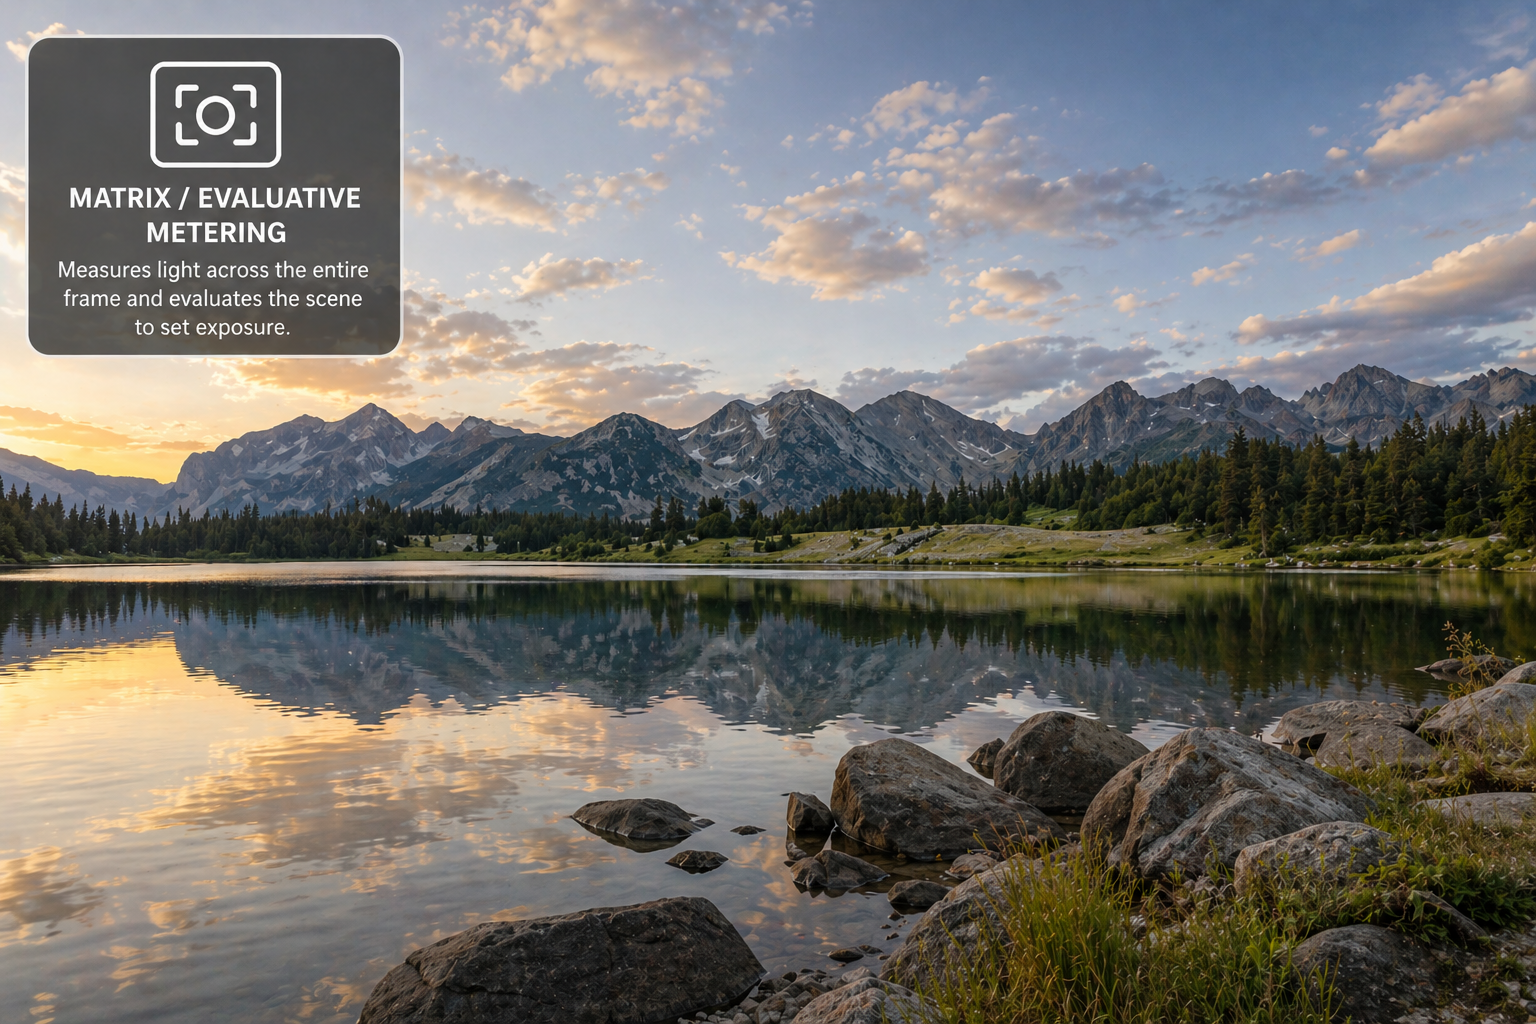
1. Matrix or evaluative metering
This is your camera’s default.
It reads the entire frame and calculates an average exposure.
Best for:
- evenly lit landscapes
- quick shooting situations
Weakness:
It plays safe. You lose colour and drama in high contrast scenes.
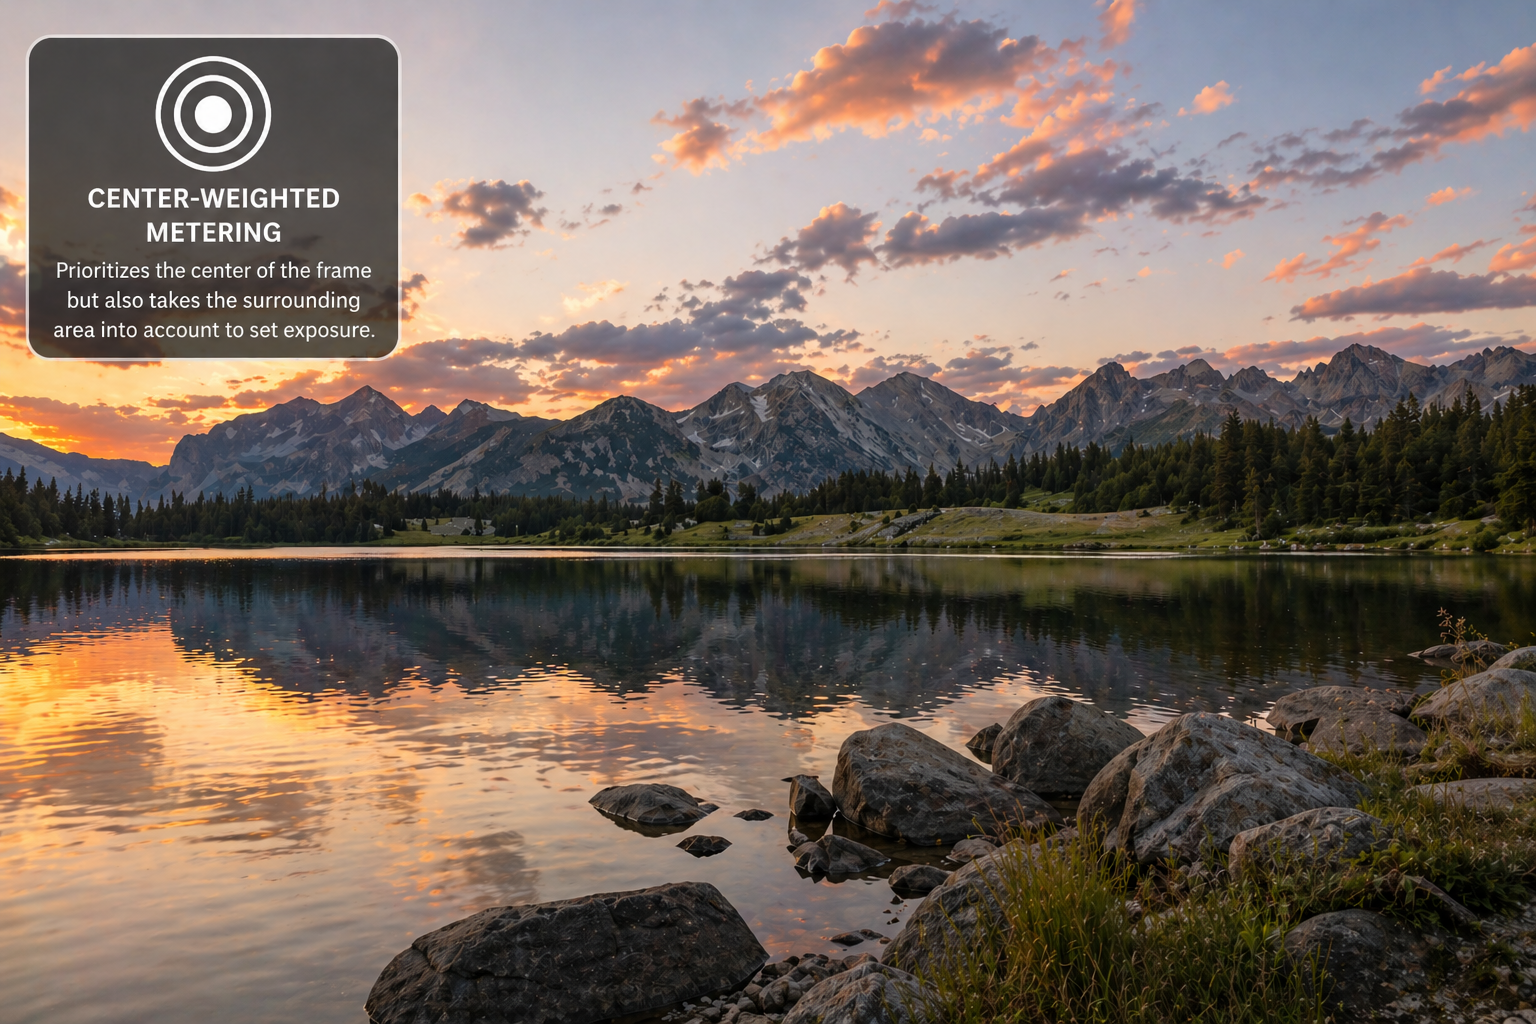
2. Centre weighted metering
This gives priority to the centre of your frame.
Best for:
- compositions with your subject in the middle
- slightly more control than matrix
Weakness:
Still too broad. It cannot handle strong contrast well.
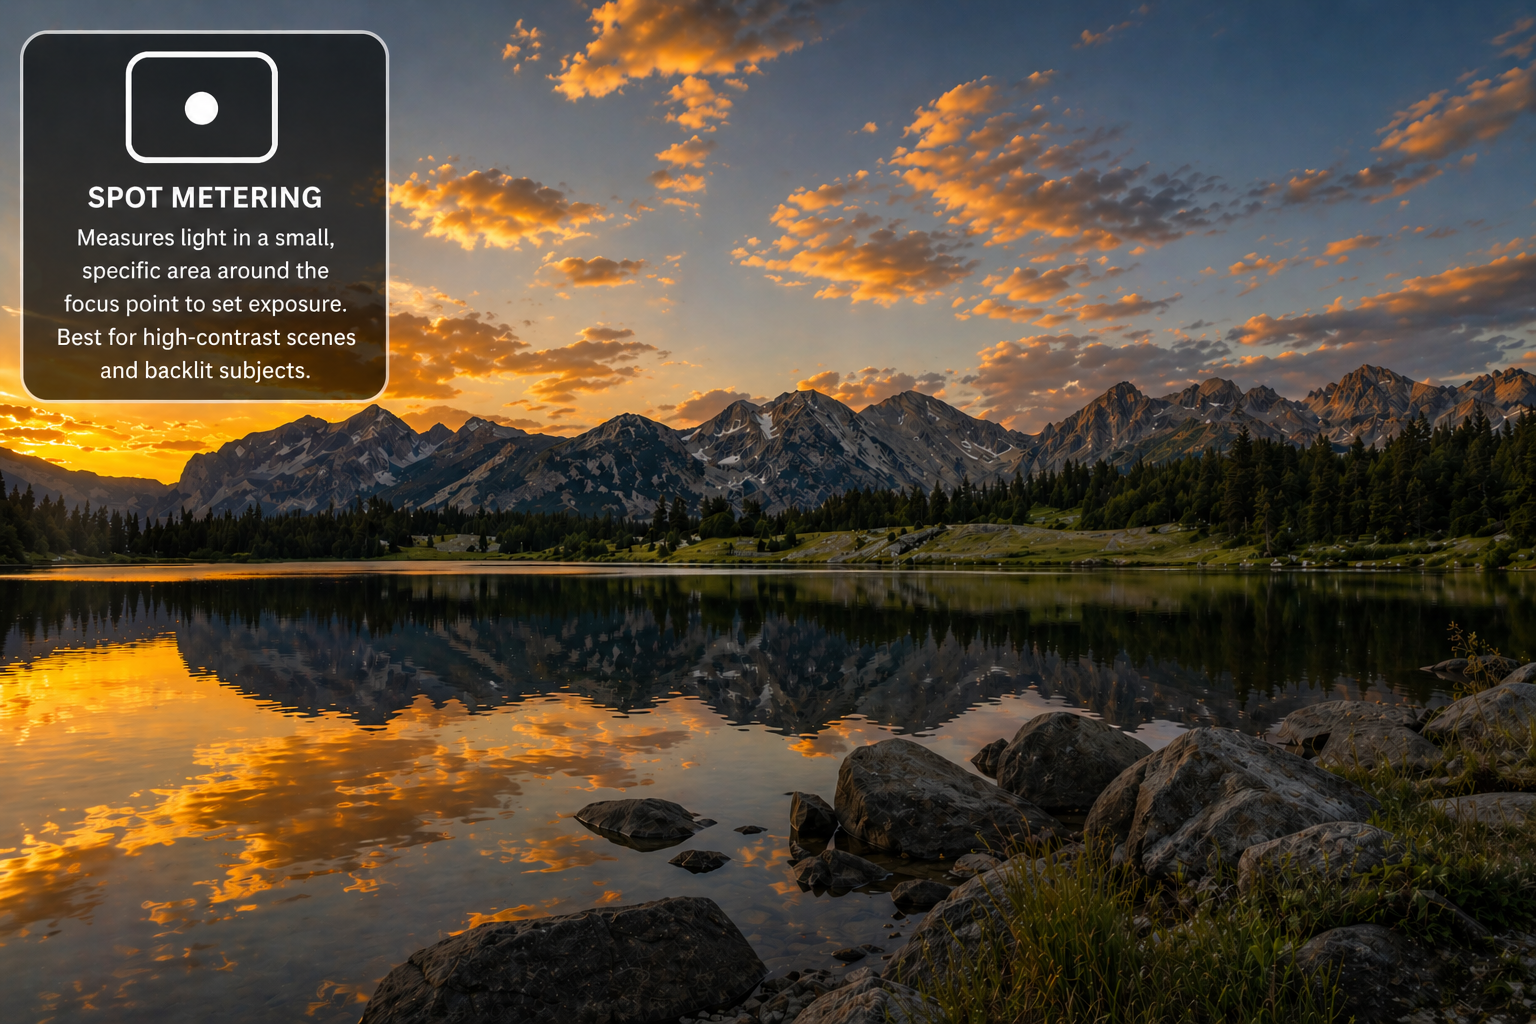
3. Spot metering
This measures a very small area, usually linked to your focus point.
Best for:
- sunrise and sunset
- backlit scenes
- precise exposure control
Strength:
You decide exactly what matters in the frame.
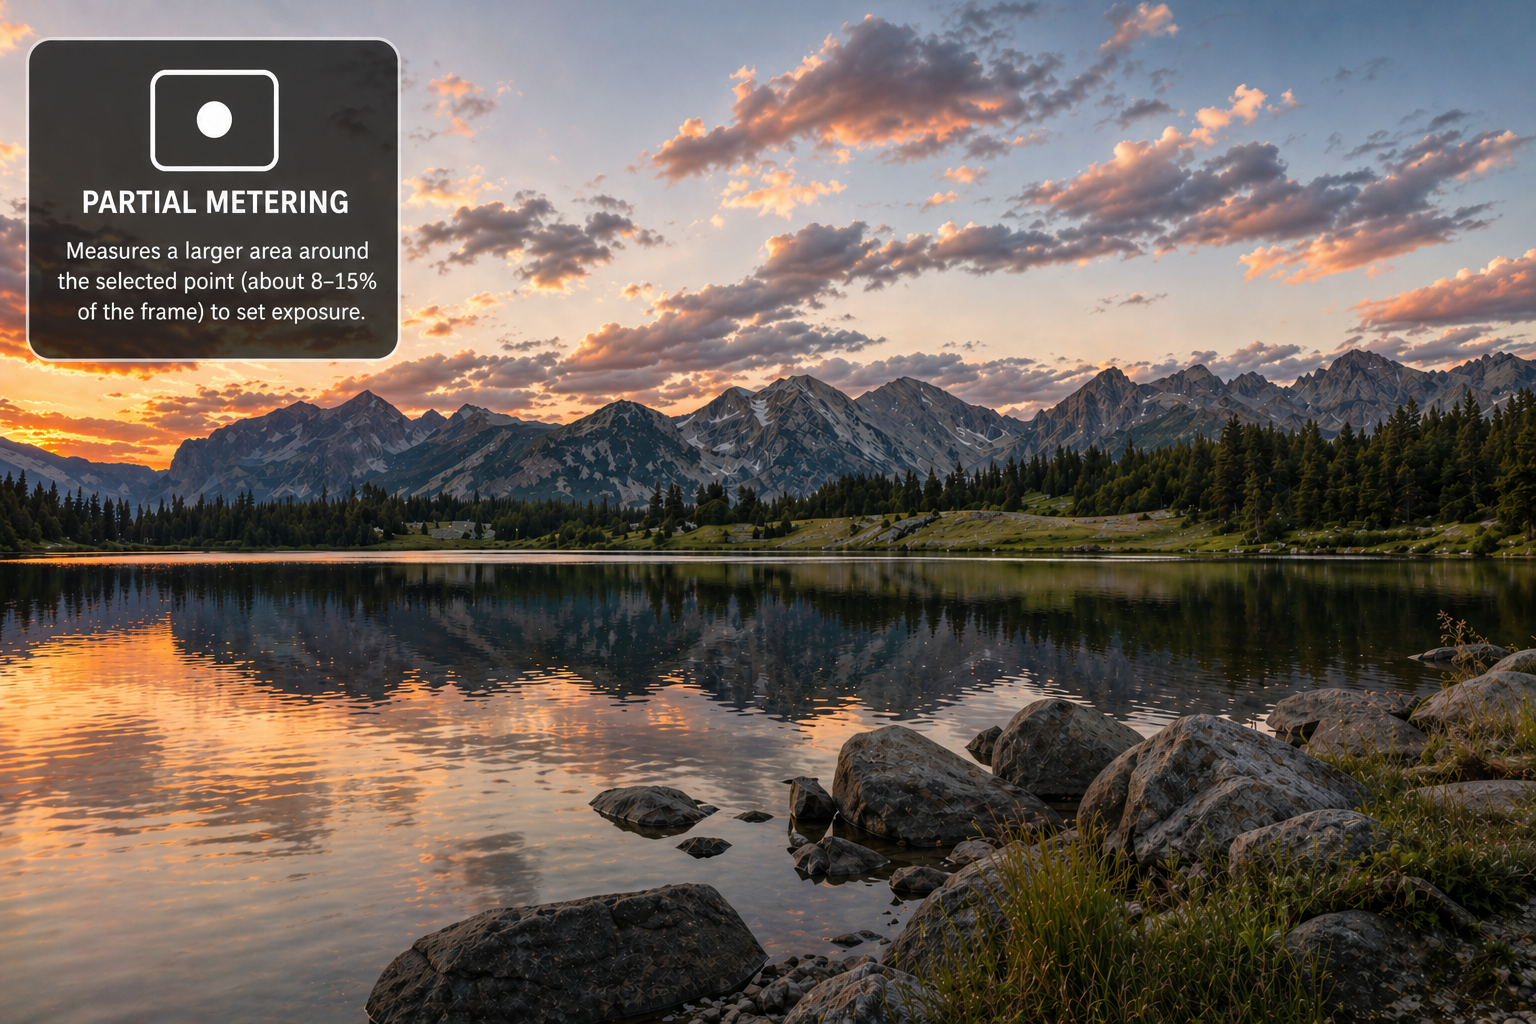
4. Partial metering
This sits between centre weighted and spot.
It measures a larger area than spot, but still focuses on a specific region.
Best for:
- bright skies with some foreground importance
- scenes where spot feels too tight
- photographers who want control but not extreme precision
Think of it as a more forgiving version of spot metering.
What I actually use in the field
If the light is flat, matrix works fine.
But when the light becomes interesting, I switch.
Most of the time:
I use spot metering.
Sometimes:
I use partial metering when the scene feels too complex for a single point.
The method that keeps your sky alive
Here’s the simple workflow I use:
- Switch to spot or partial metering
- Aim at the brightest part of the sky
- Lock exposure
- Recompose and shoot
This does one important thing.
It protects your highlights.
Because once highlights are blown, they are gone.
Shadows can always be recovered later.
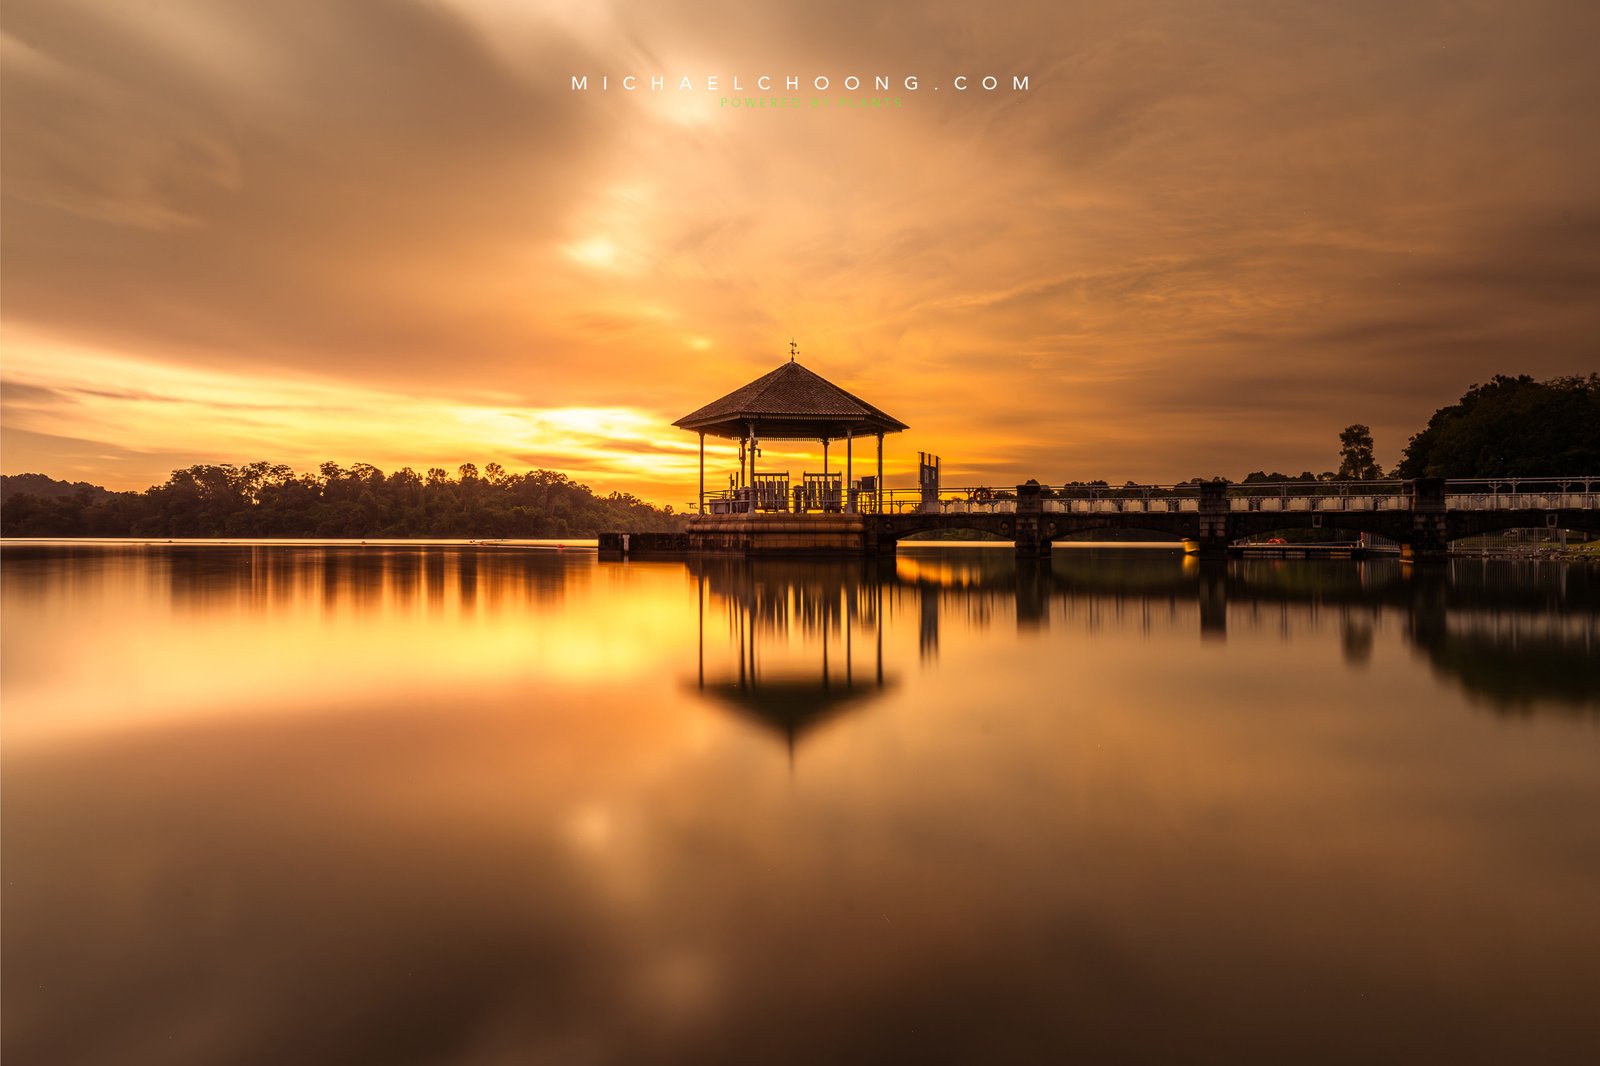
What happened during our last outing
At Lower Peirce, the sky turned deep red.
Some photographers used matrix metering.
Their images looked pale and flat.
Others exposed for the highlights using spot or partial.
Their images held colour, depth, and contrast.
Same place. Same moment. Different results.
Common mistake to avoid
Trying to fix exposure in editing.
You end up with:
- clipped highlights
- muddy shadows
- more time behind the screen
Good photography starts at capture, not in Lightroom.
Pro tips you can use immediately
- dial down exposure slightly, around minus 0.3 to minus 1 EV
- always check your histogram, not just the LCD
- shoot RAW for maximum flexibility
- try partial metering when spot feels too harsh
Quick cheat sheet
- flat light → matrix
- subject in centre → centre weighted
- high contrast → spot
- complex light → partial

One simple exercise
Next time you shoot a sunset:
Take three shots of the same scene.
One with matrix.
One with spot.
One with partial.
Compare them.
You’ll understand metering faster than any tutorial.
Final thought
The camera does not know what you care about.
Metering is how you tell it.
If you want to practise this in real conditions, join our next photo outing. That’s where everything clicks.
And if you want a ready structure for your next post, these high-performing blog formats can help you shape it better
Hi Michael, thanks for sharing the metering knowledge and when to use them. Hope I can apply this later in the AMK Bishan photo walk
Pingback: Focus Modes in Landscape Photography: Why Your Shots Are Not Sharp – Michael Choong Photography