
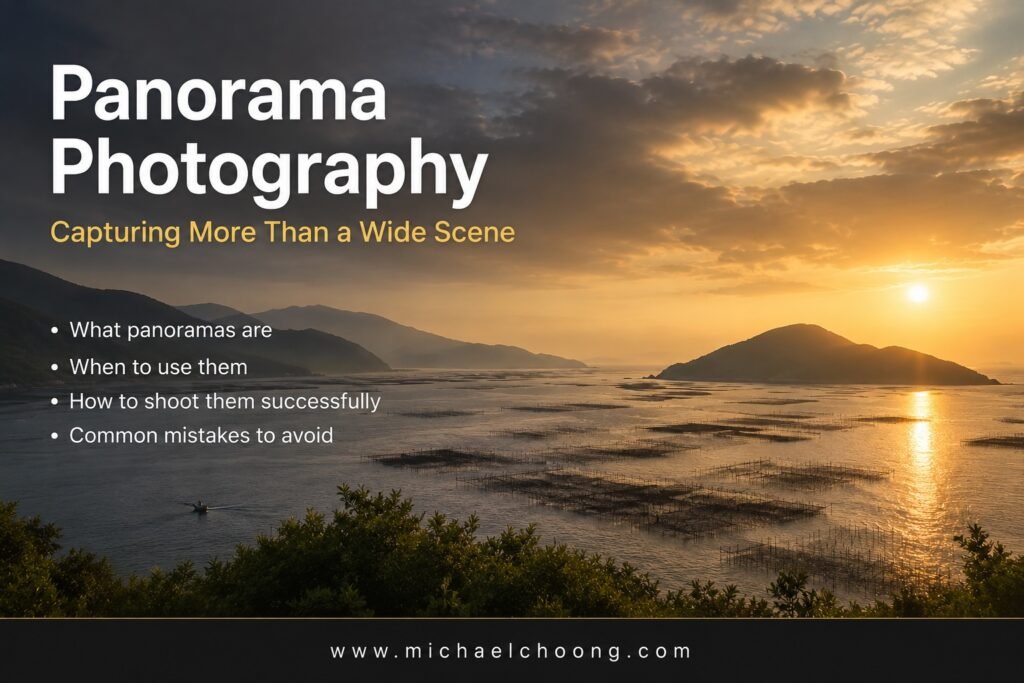
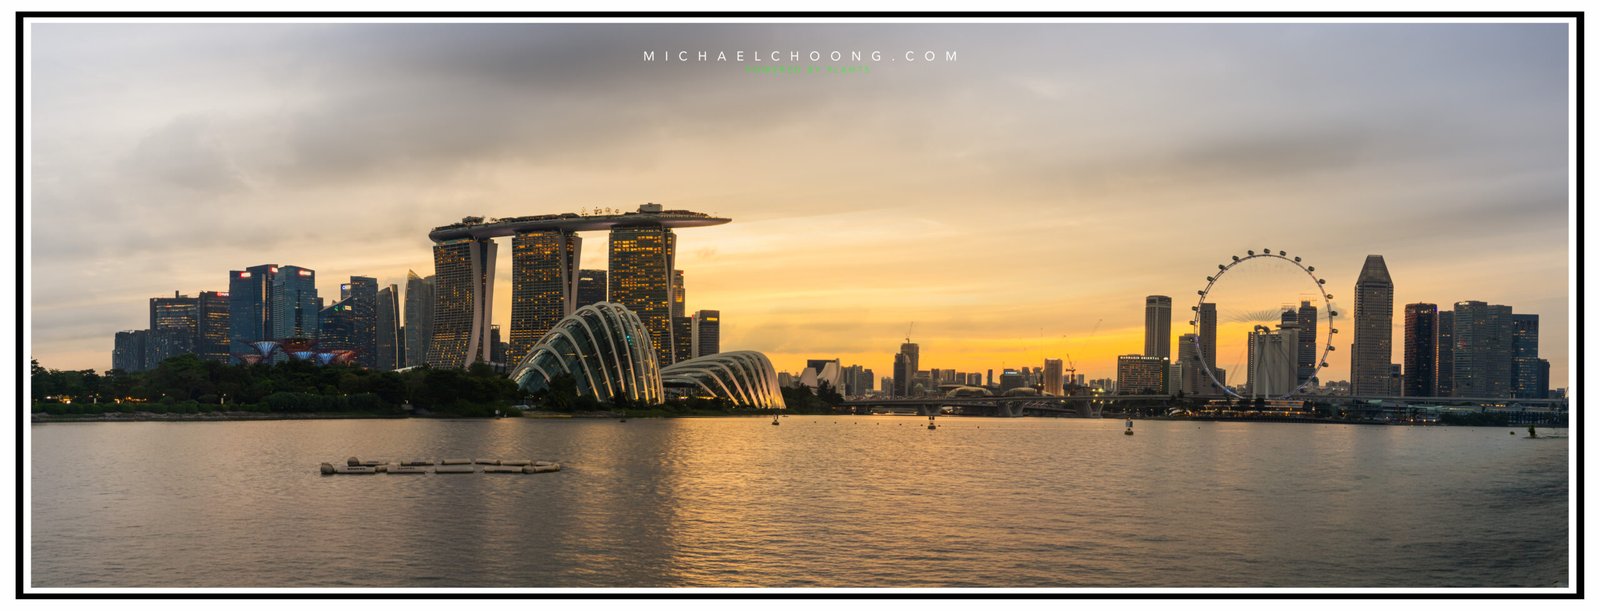
A few weeks ago in Xiapu, I found myself standing on a hillside overlooking a vast stretch of sea farms.
The sunrise was beautiful. The reflections were beautiful. The layers of mountains disappearing into the morning haze were beautiful.
The problem?
No single frame could capture what I was seeing.
That’s when panorama photography becomes more than a feature hidden inside your camera menu. It becomes the best tool for telling the story of a place.
Today I’d like to share how I approach panorama photography and a few simple techniques that have helped me create stronger panoramic images over the years.
What Is Panorama Photography?
Most photographers think a panorama is simply a very wide photograph.
That’s partly true.
A panorama is created by taking multiple overlapping images and stitching them together into a single photograph.
The result is not only wider. It often contains significantly more detail than a single frame.
Think of it as building a photograph piece by piece instead of trying to fit everything into one shot.
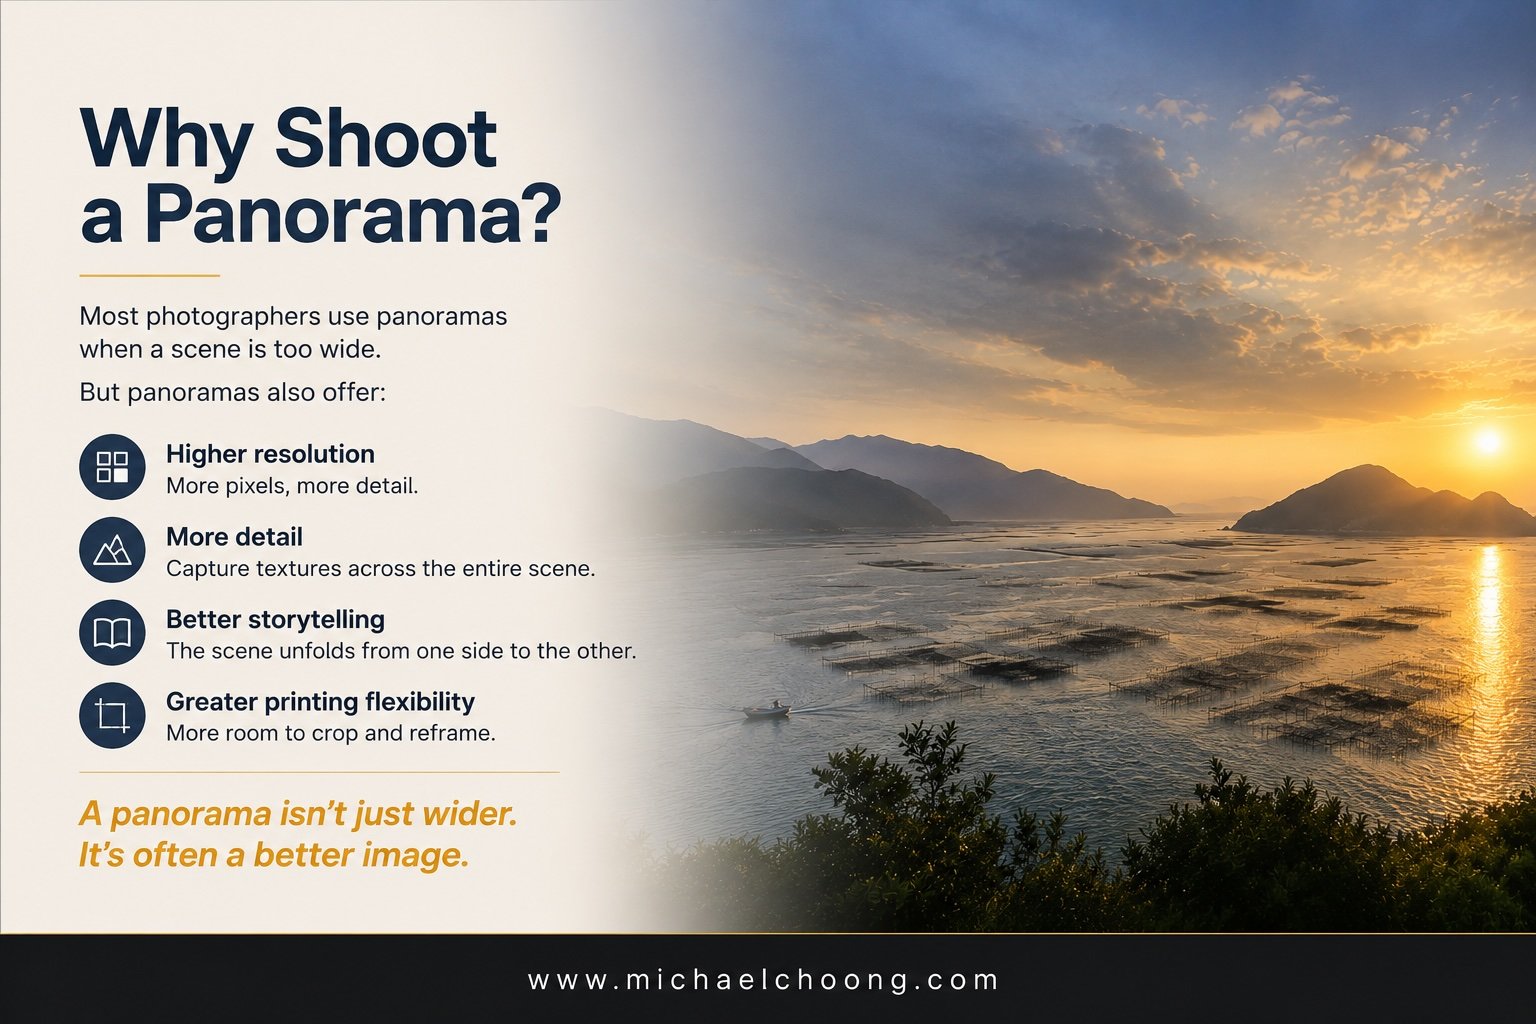
Why Shoot A Panorama?
The obvious reason is when the scene is too wide.
But that’s not the main reason I use panoramas.
I use them because they create better files.
A stitched panorama gives:
-
Higher resolution
-
More detail
-
Better storytelling
-
Greater flexibility for printing
When viewers can zoom into a landscape and still discover texture, light and detail, the image becomes far more engaging.
A panorama isn’t just wider.
It’s often a better photograph.
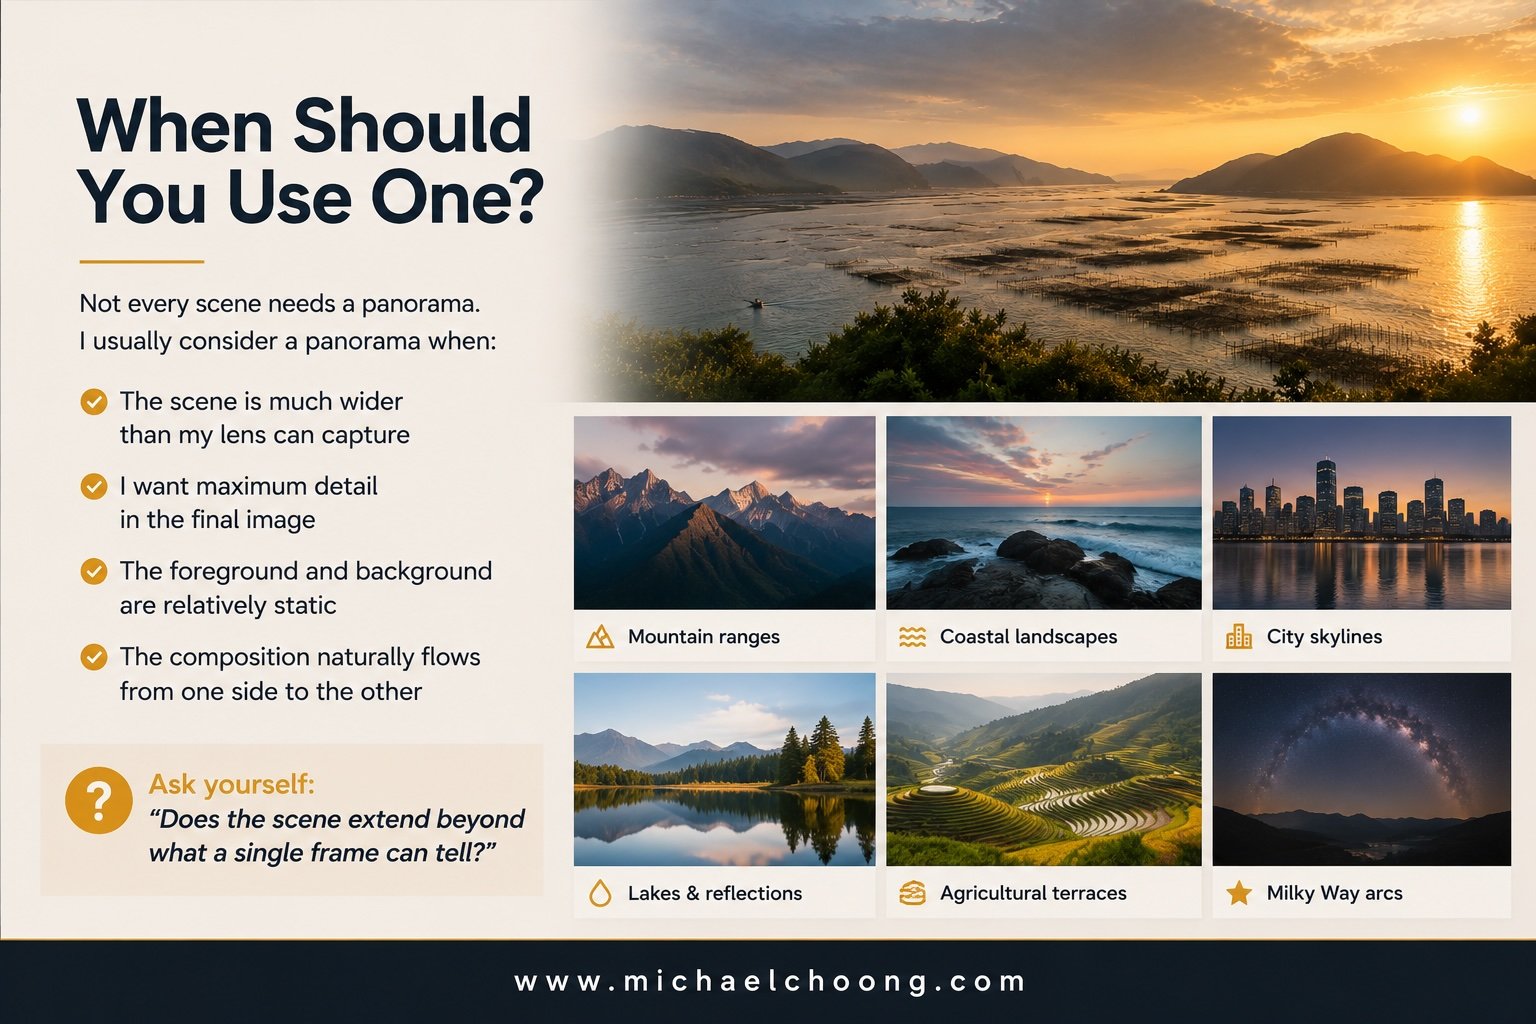
When Should You Use One?
Not every landscape needs a panorama.
Sometimes a single frame tells the story perfectly.
I usually consider a panorama when:
-
The scene stretches beyond my lens
-
I want maximum detail
-
The scene is relatively static
-
The composition naturally flows across the frame
Panoramas work particularly well for:
-
Mountain ranges
-
Coastlines
-
City skylines
-
Lakes and reflections
-
Rice terraces
-
Milky Way landscapes
A simple question helps.
Does the scene extend beyond what a single frame can tell?
If the answer is yes, a panorama may be the better choice.
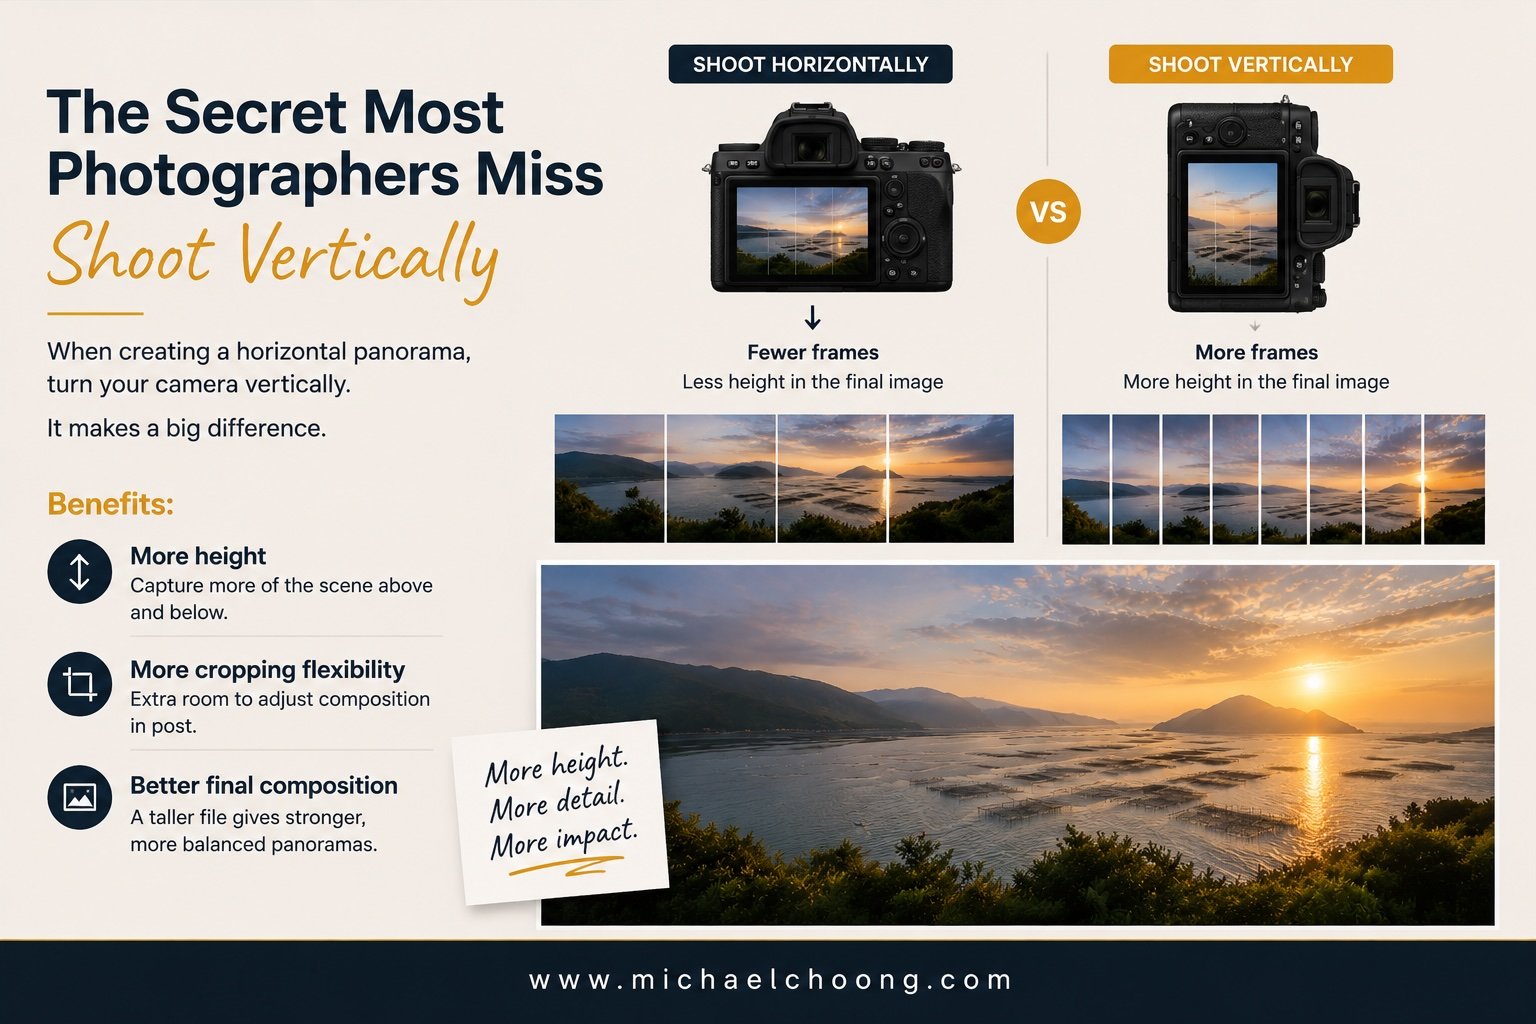
The Secret Most Photographers Miss
This one surprises many people.
When creating a horizontal panorama, I usually rotate my camera vertically.
Why?
Because vertical frames capture more height.
That extra height gives me:
-
More flexibility when cropping
-
Better balance between sky and foreground
-
A stronger final composition
Many photographers shoot panoramas horizontally because it feels natural.
In reality, vertical frames usually produce a much stronger result.
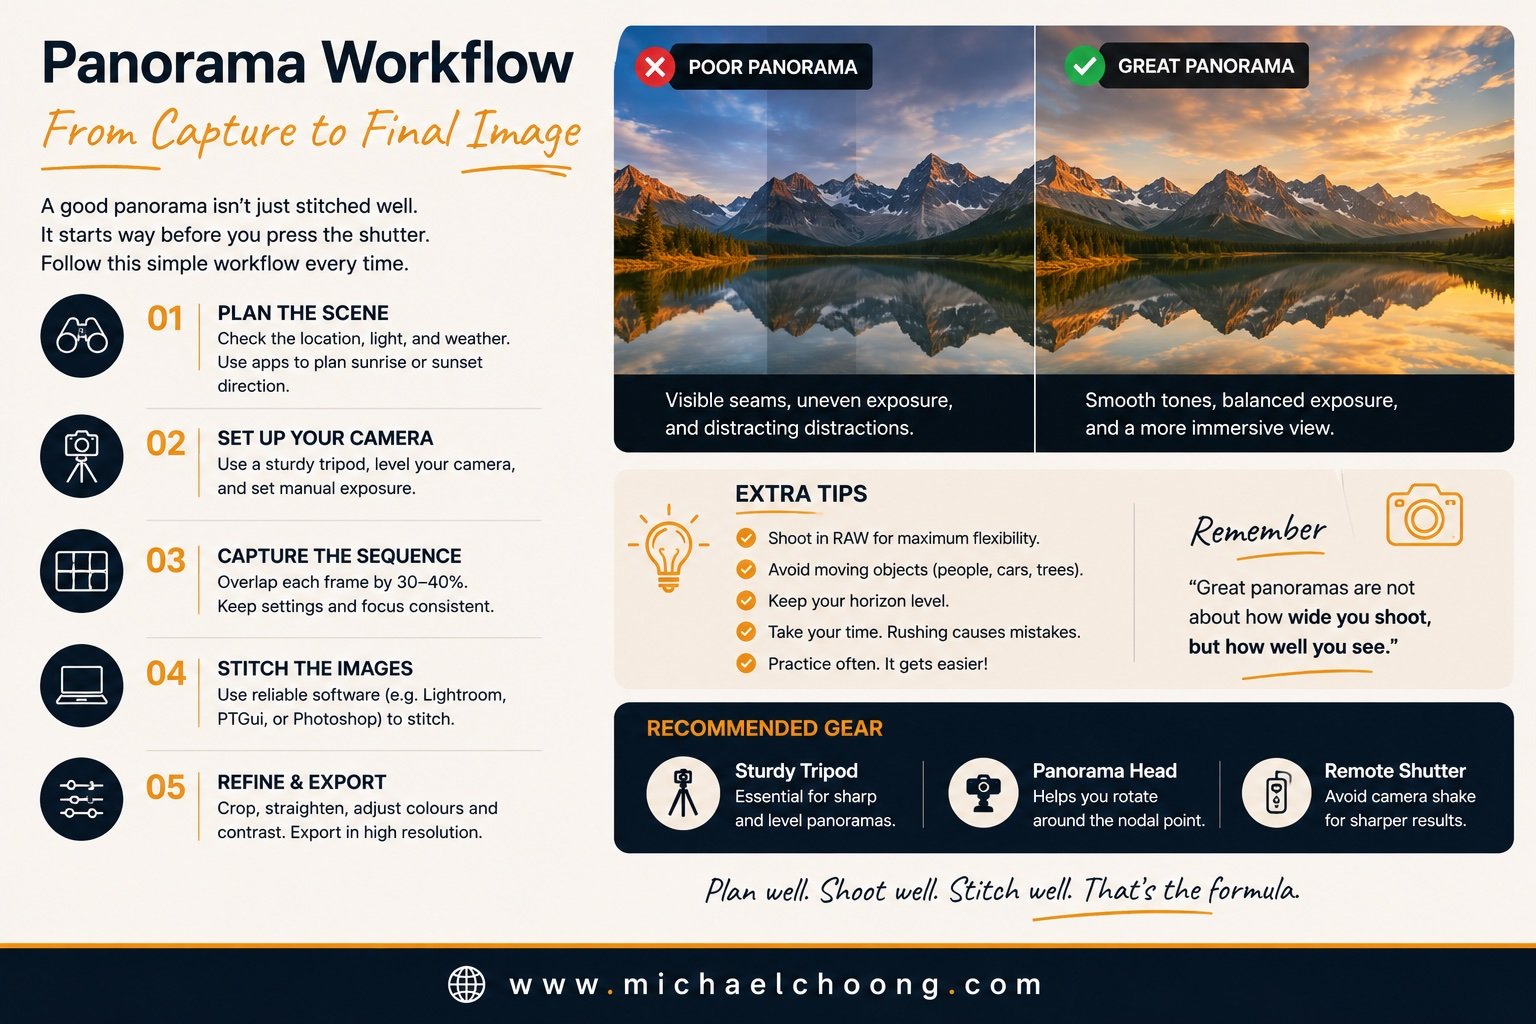
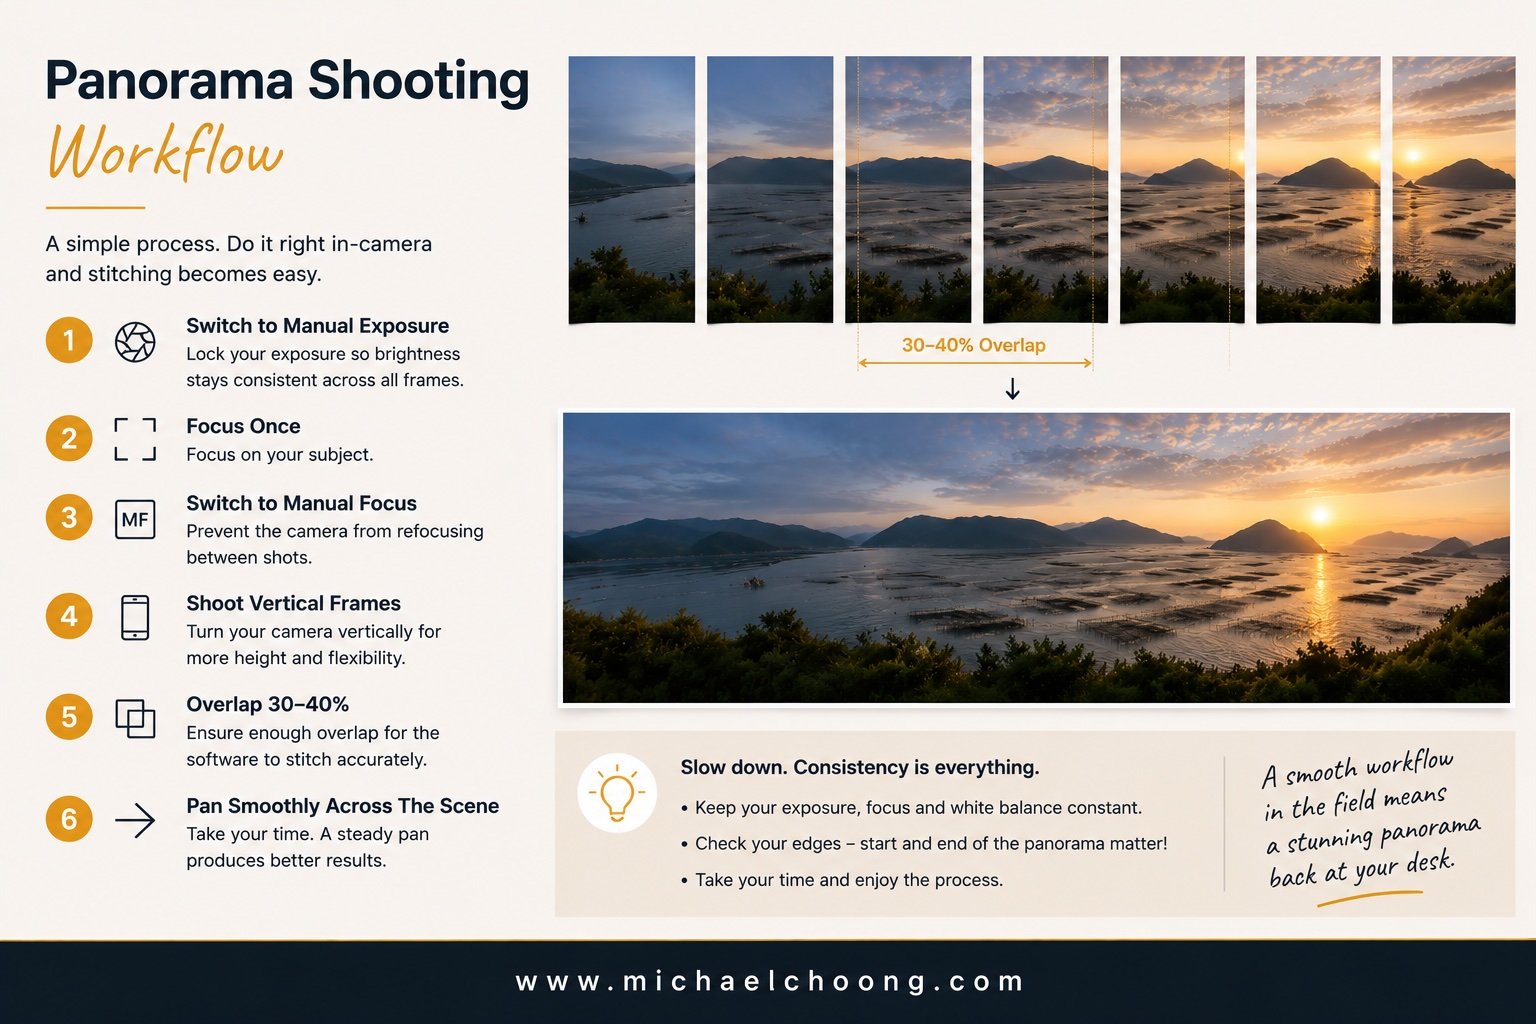
My Panorama Shooting Workflow
The actual process is very simple.
I follow the same routine every time.
-
Set manual exposure
-
Focus once
-
Switch to manual focus
-
Turn the camera vertically
-
Overlap each frame by about 30 to 40 percent
-
Pan smoothly across the scene
That’s it.
Good panoramas are built through consistency rather than complicated techniques.
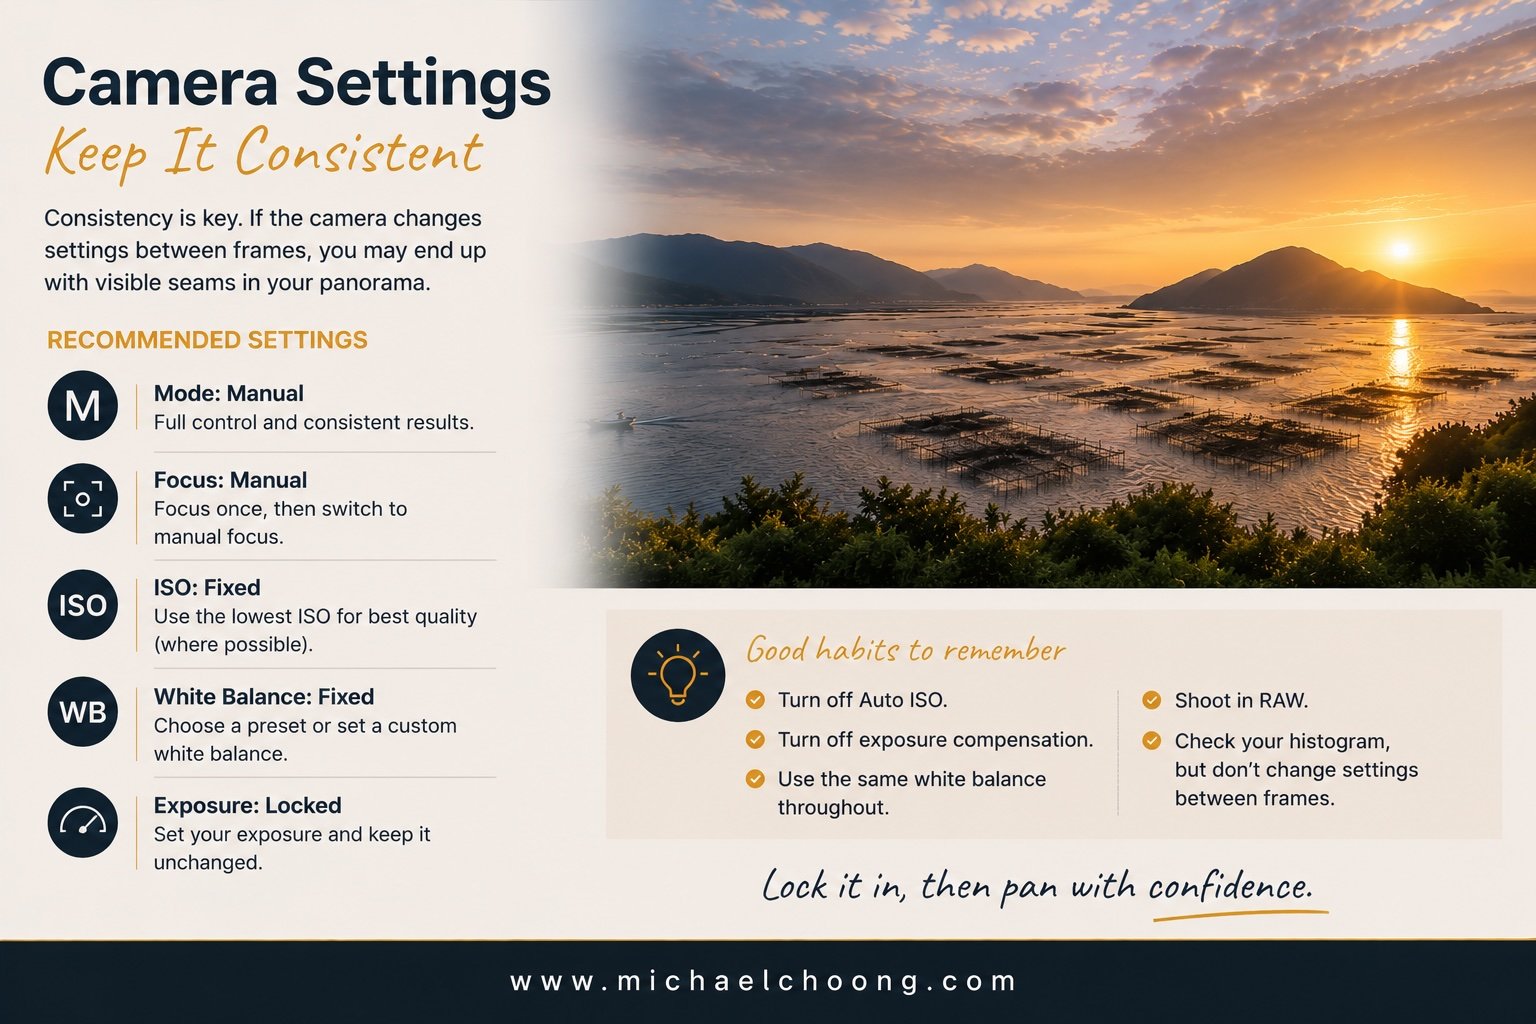
Keep Your Camera Settings Consistent
This is where many stitching problems begin.
If your exposure changes halfway through a sequence, Lightroom will try its best to fix it, but the results are rarely perfect.
Before I start shooting, I lock:
-
Exposure
-
Focus
-
ISO
-
White balance
Every frame should match the one before it.
The camera should not be making decisions while you’re shooting the panorama.
Consistency is the key to seamless stitching.
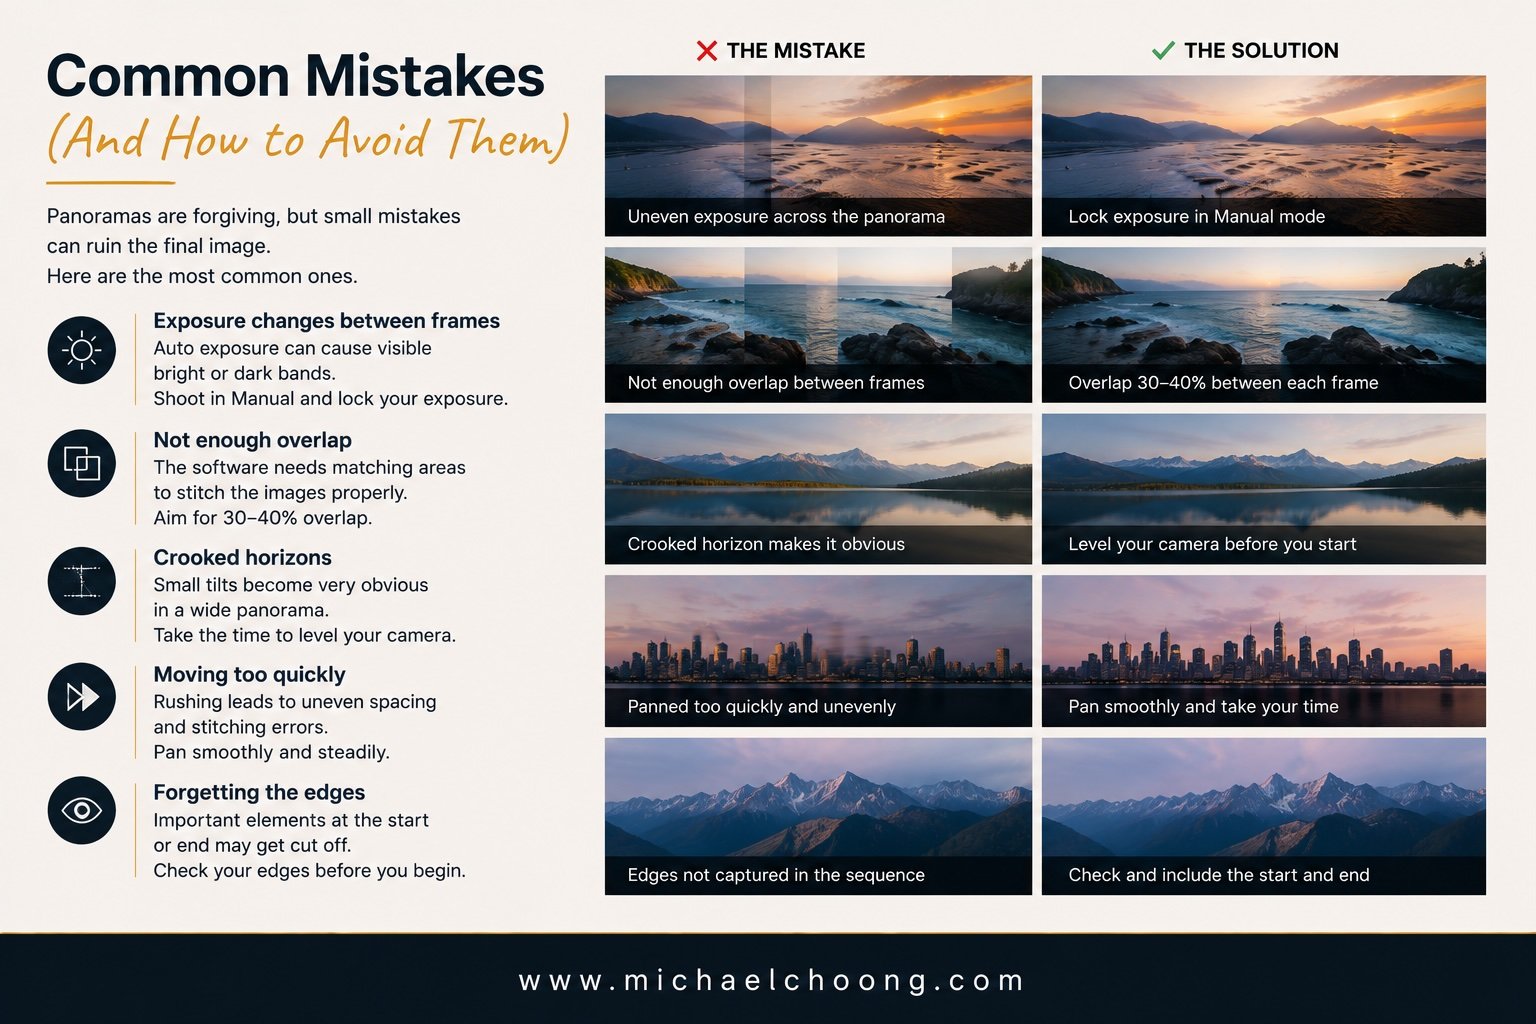
Common Panorama Mistakes
Most panorama failures come from a few simple mistakes.
The biggest ones are:
Changing Exposure
Auto exposure can create visible bright and dark bands across the image.
Not Enough Overlap
The software needs common areas to stitch correctly.
Crooked Horizons
Small tilts become very obvious in wide panoramas.
Moving Too Quickly
Rushing often creates alignment problems.
Forgetting The Edges
Many photographers focus on the middle and accidentally crop important elements from the start or end of the sequence.
Slow down.
Most stitching problems happen before you even get back to the computer.
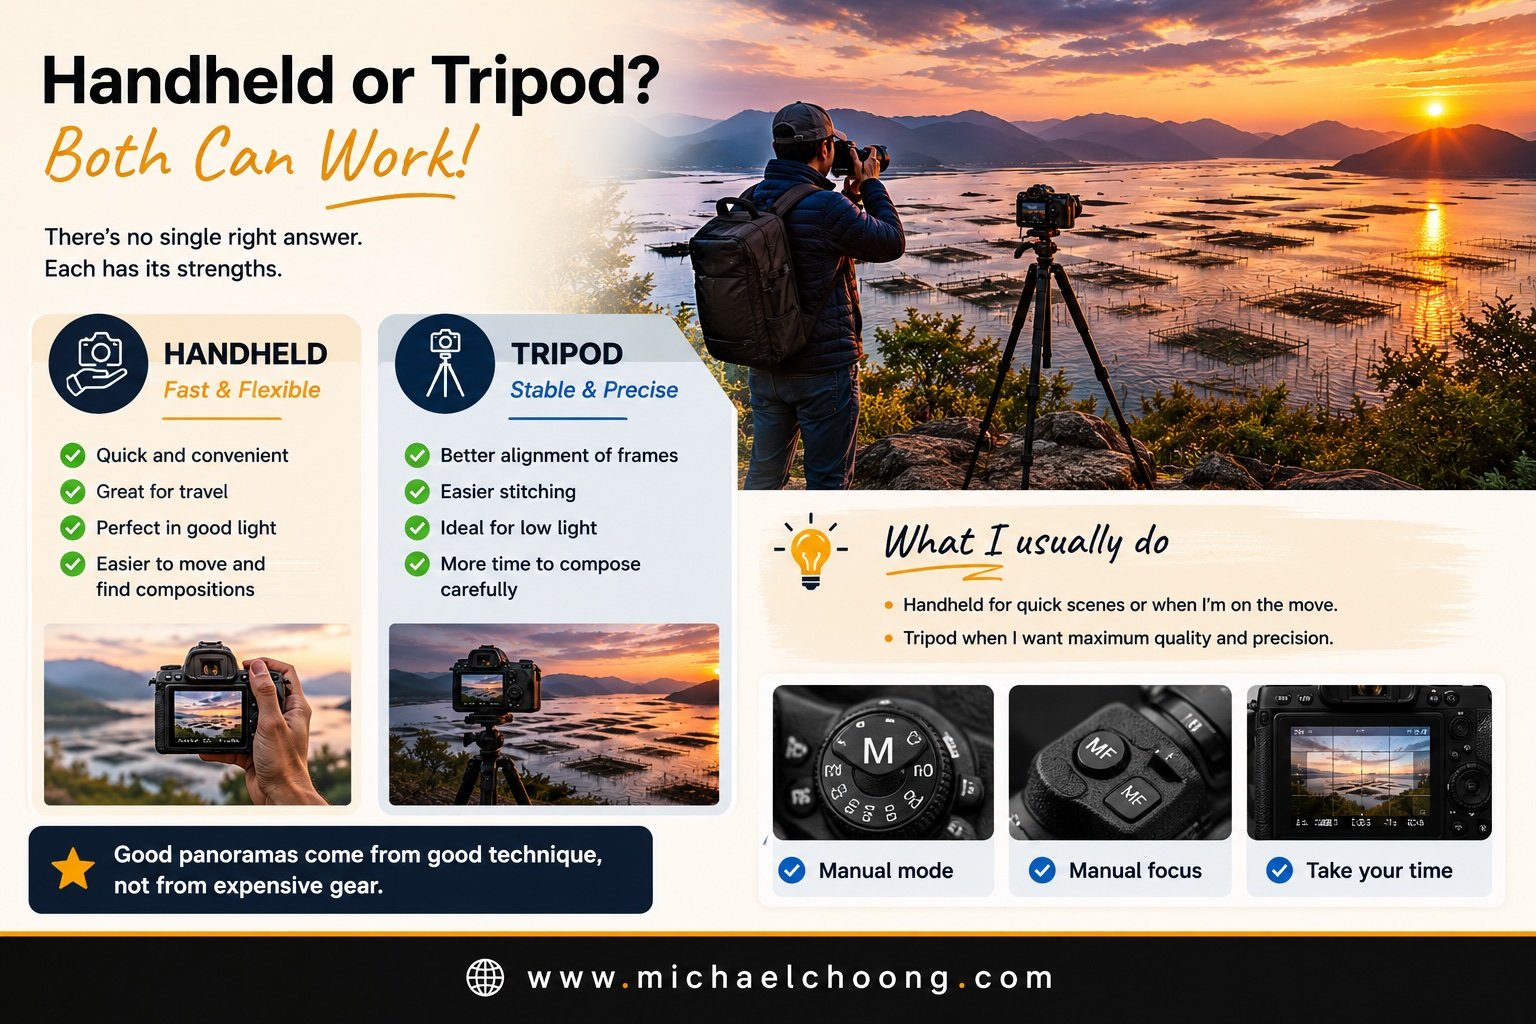
Handheld Or Tripod?
I get asked this question all the time.
The answer is simple.
Both work.
Handheld panoramas are:
-
Fast
-
Convenient
-
Great for travel
Tripod panoramas are:
-
More precise
-
Easier to stitch
-
Better in low light
Personally, I use both.
If I’m travelling light, I shoot handheld.
If I have time and want the highest quality possible, I use a tripod.
Good panoramas come from good technique, not expensive gear.
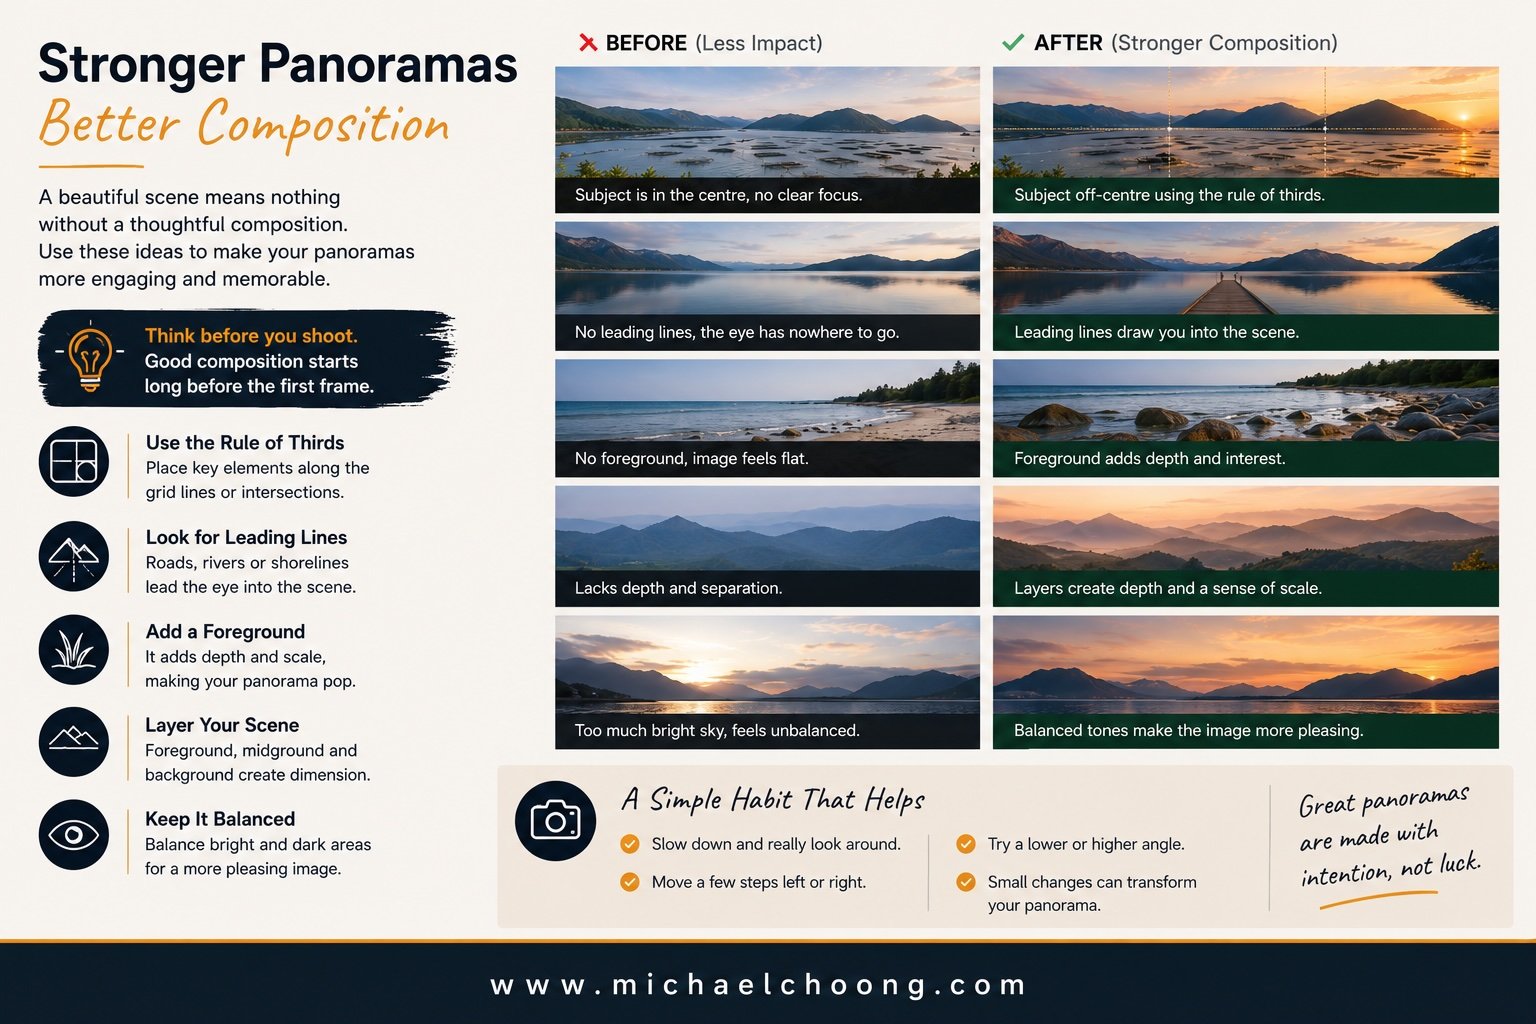
Composition Matters More Than Width
A wide image doesn’t automatically make a strong image.
The same composition rules still apply.
Look for:
-
Leading lines
-
Foreground interest
-
Layers
-
Balance
-
Rule of thirds placement
A panorama should guide the viewer’s eye across the frame.
The best panoramic images don’t feel wide.
They feel immersive.
Stitching It All Together
Once I’m back at my computer, the final step takes only a few minutes.
Inside Lightroom:
Photo → Photo Merge → Panorama
Lightroom creates a new DNG file that behaves like any other RAW image.
From there I edit normally.
The magic happens because the hard work was already done in the field.
Good stitching starts long before you press the Merge button.
Final Thoughts
Panorama photography isn’t really about creating wider photographs.
It’s about capturing the feeling of standing there.
The scale.
The atmosphere.
The experience.
The next time you find yourself in front of a scene that feels too big for a single frame, don’t reach for a wider lens immediately.
Take a breath.
Slow down.
Build the image one frame at a time.
You might be surprised by just how much more of the story you bring home.
Enjoyed this article?
Join over 1000 photographers who receive Michael's Lens every week.
Get photography tips, outing invitations, editing tutorials and behind-the-scenes stories straight to your inbox.