
Most photographers ask the same question.
“What settings should I use for landscape photography?”
The problem is that there is no single answer.
The best settings for a sunrise at Mount Bromo will be completely different from the best settings for a waterfall in Iceland or a cityscape at Marina Bay during blue hour.
After years of shooting landscapes, I’ve realised that good settings are not about memorising numbers. They are about asking the right questions.
Whenever I arrive at a location, I run through a simple mental checklist. It takes less than a minute and helps me quickly find the right settings for the scene in front of me.
Here is the exact process I use.
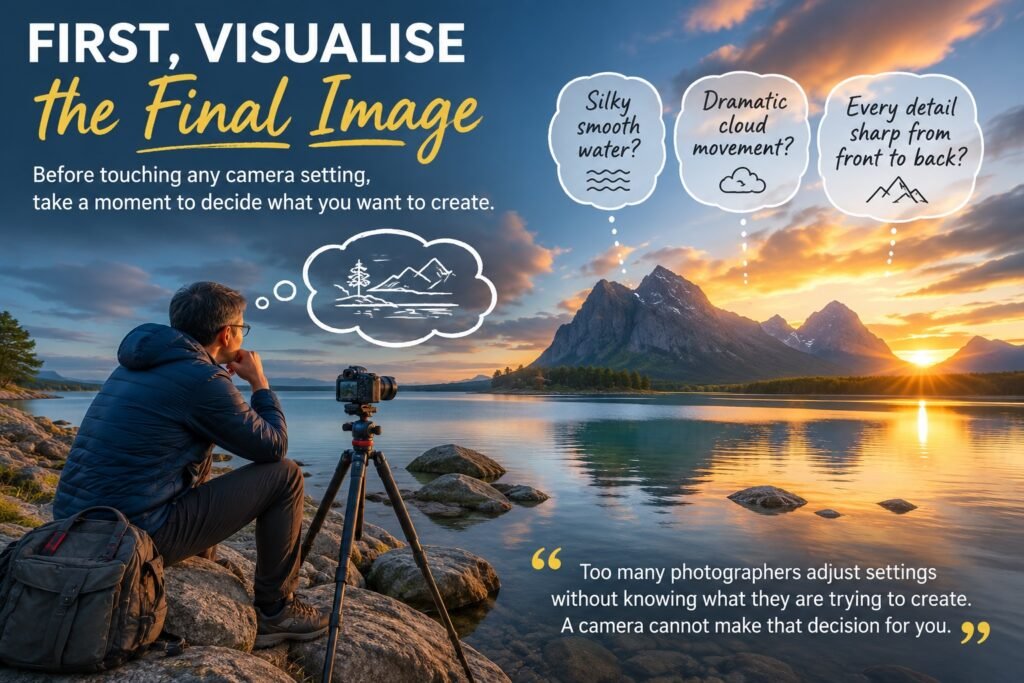
First, Visualise the Final Image
Before touching any camera setting, I take a moment to think about what I want the photograph to look like.
Do I want silky smooth water?
Do I want dramatic cloud movement?
Do I want every detail sharp from front to back?
The answers will influence every setting that follows.
Too many photographers start by adjusting camera settings without knowing what they are trying to create.
A camera cannot make that decision for you.
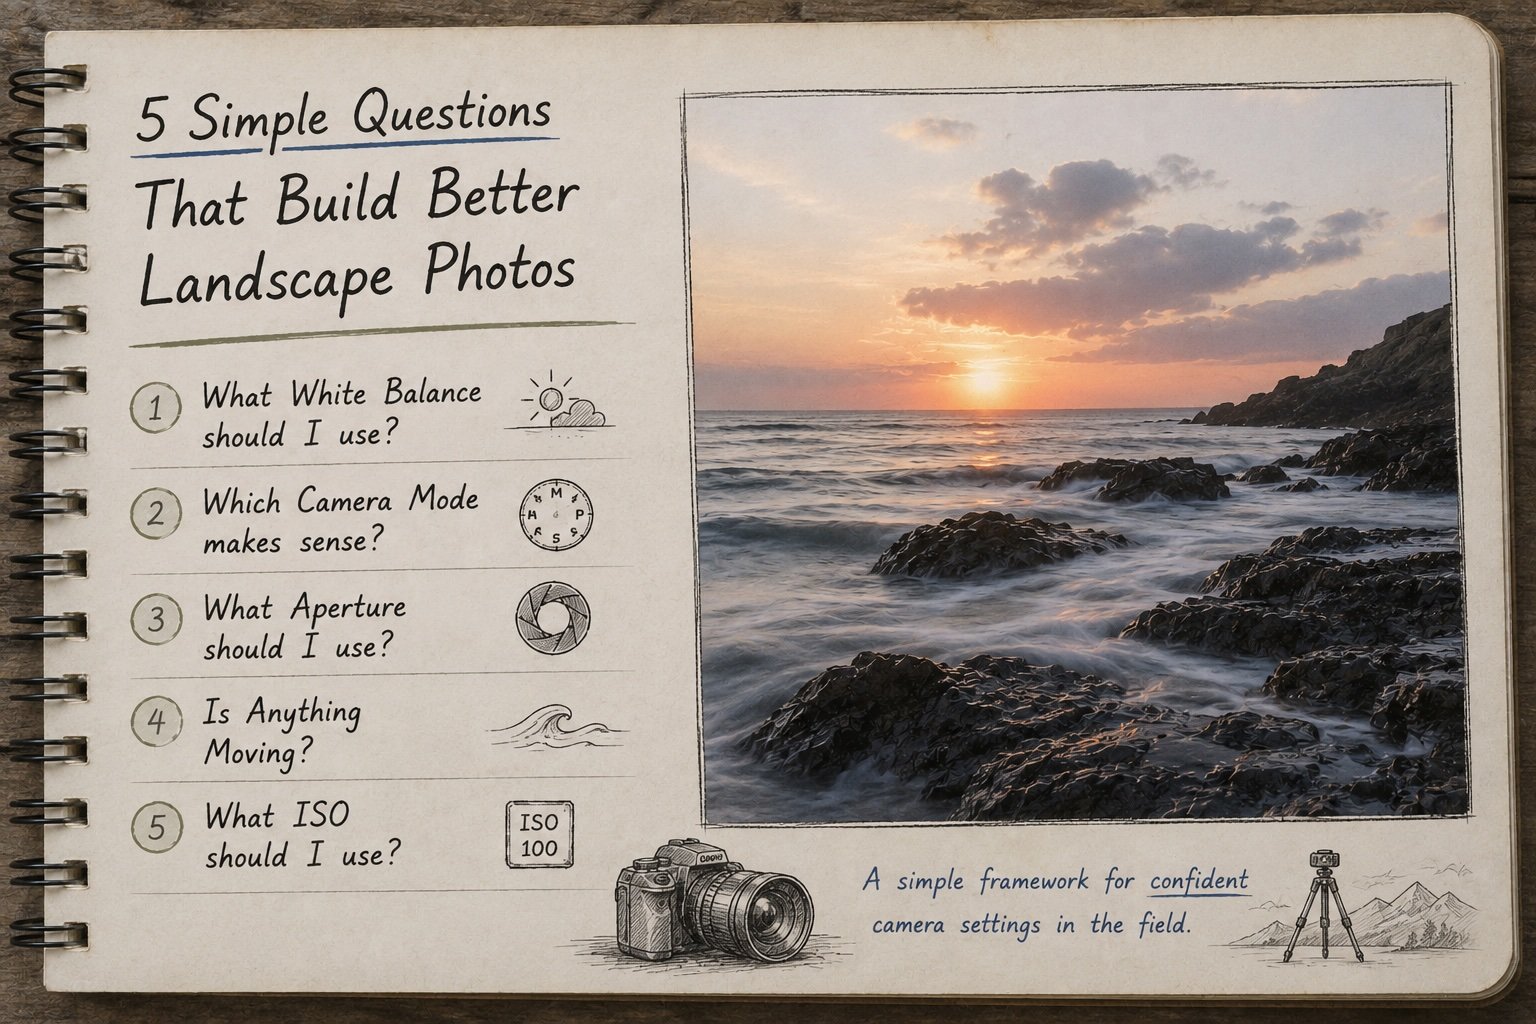
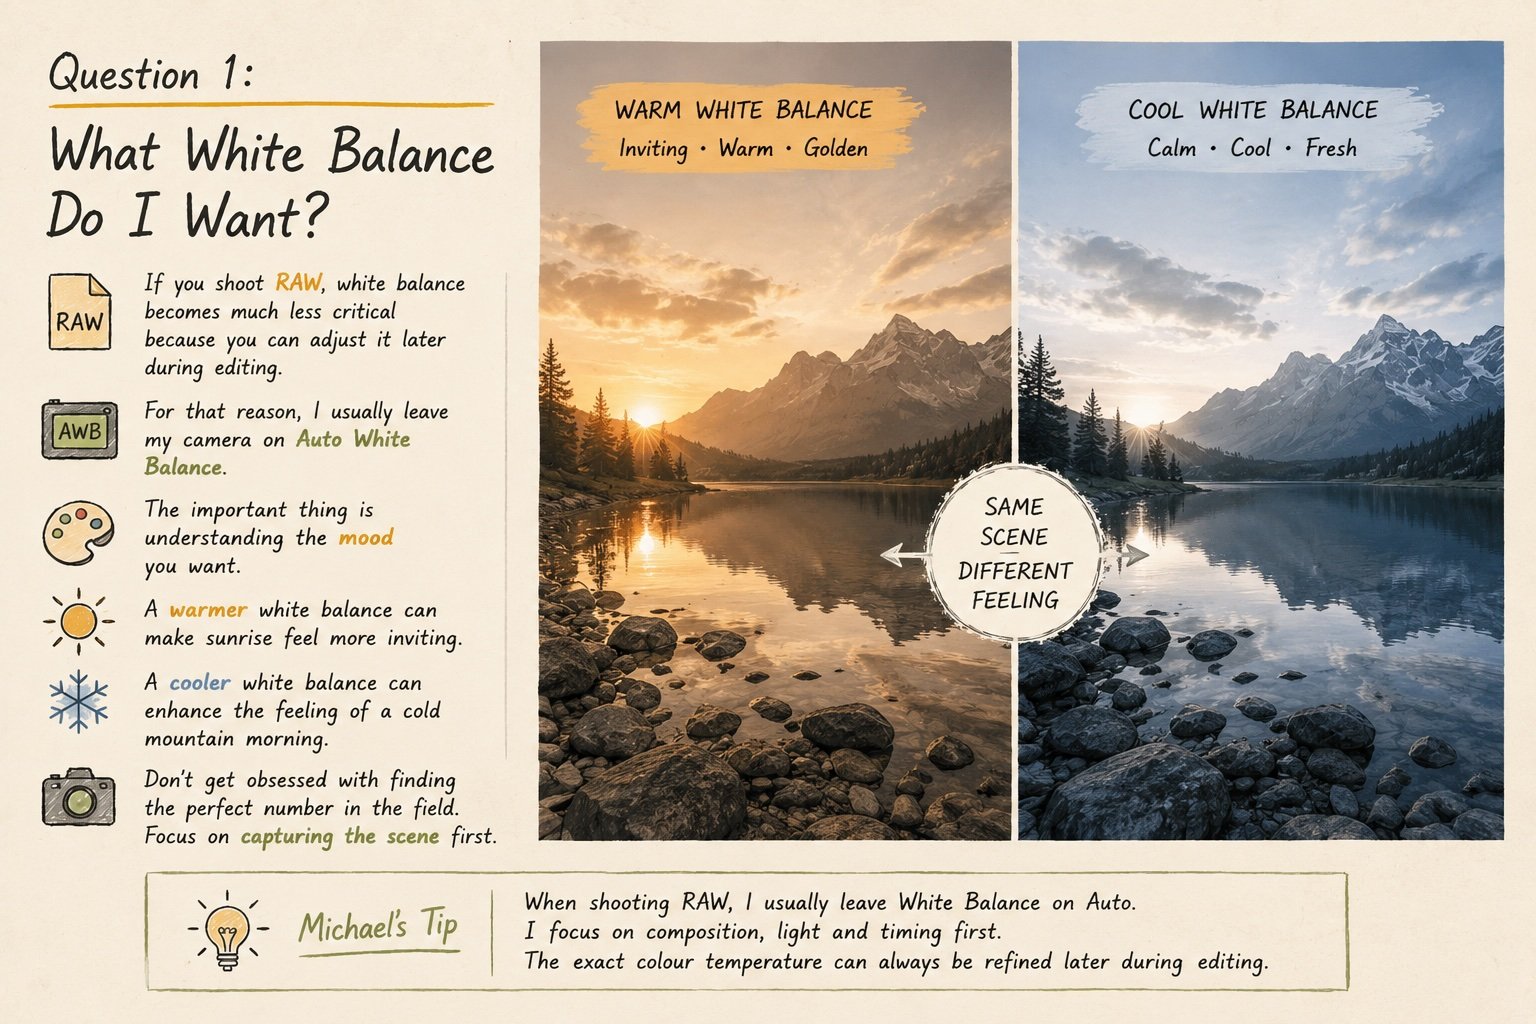
Question 1: What White Balance Do I Want?
If you shoot RAW, white balance becomes much less critical because you can adjust it later during editing.
For that reason, I usually leave my camera on Auto White Balance.
The important thing is understanding the mood you want.
A warmer white balance can make sunrise feel more inviting.
A cooler white balance can enhance the feeling of a cold mountain morning.
Don’t get obsessed with finding the perfect number in the field.
Focus on capturing the scene first.
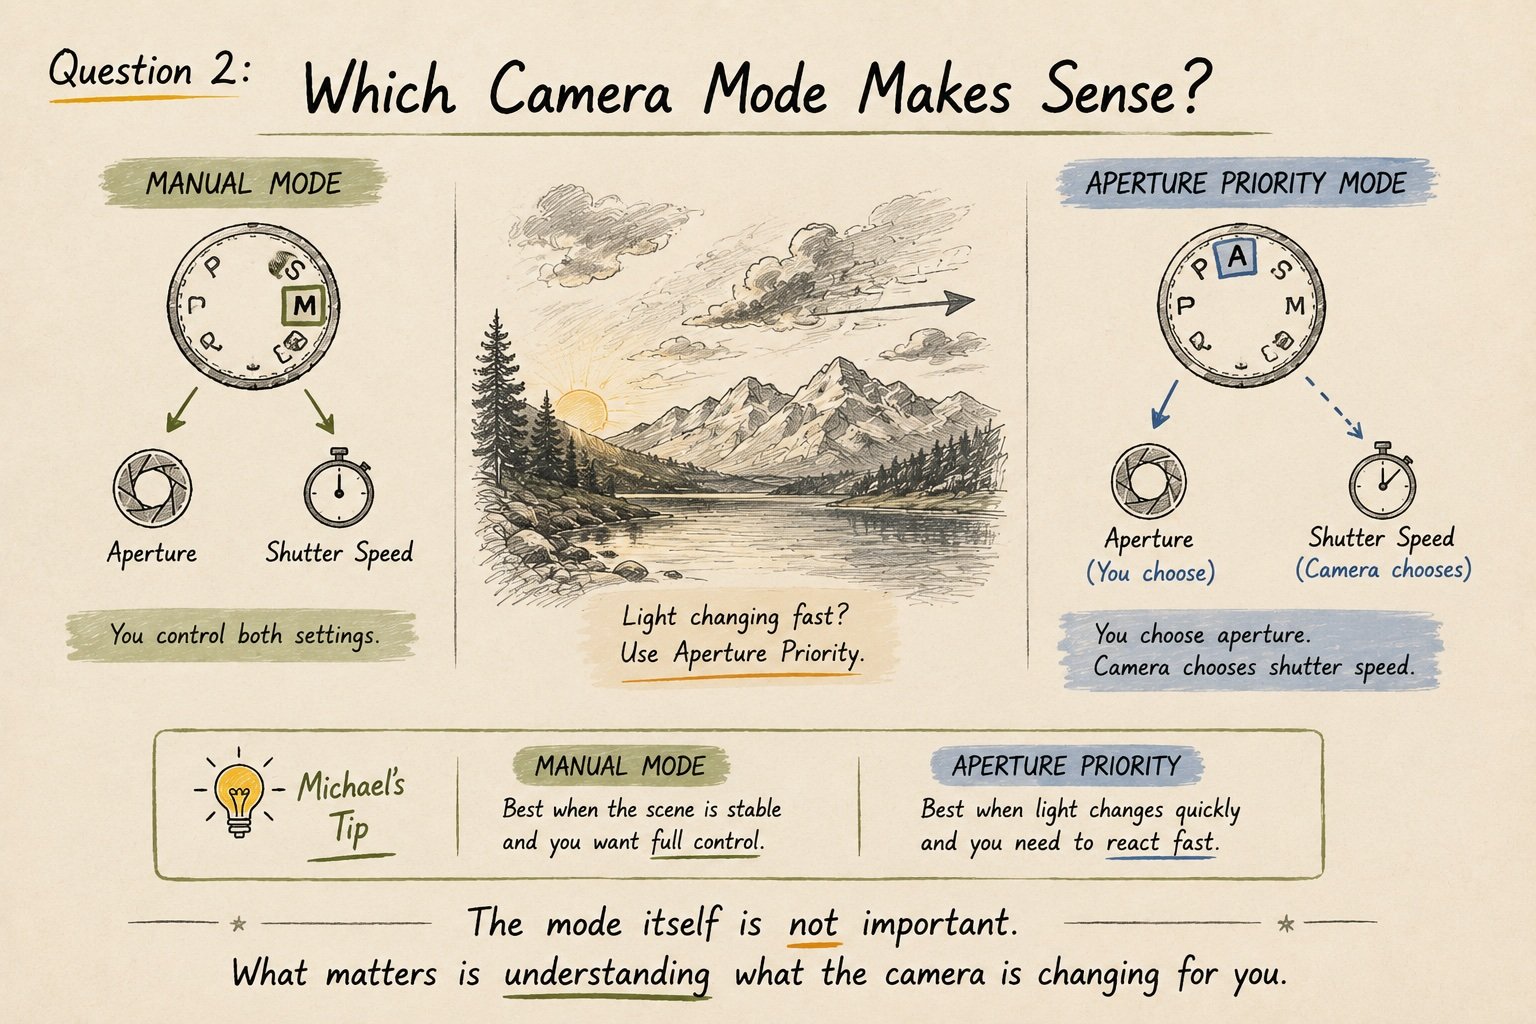
Question 2: Which Camera Mode Makes Sense?
Most landscape photographers spend their time in either:
-
Manual Mode
-
Aperture Priority Mode
I personally use Manual Mode most of the time because it gives me complete control over both aperture and shutter speed.
However, if the light is changing quickly and I need to react fast, Aperture Priority can be incredibly useful.
The mode itself is not important.
What matters is understanding what the camera is changing for you.
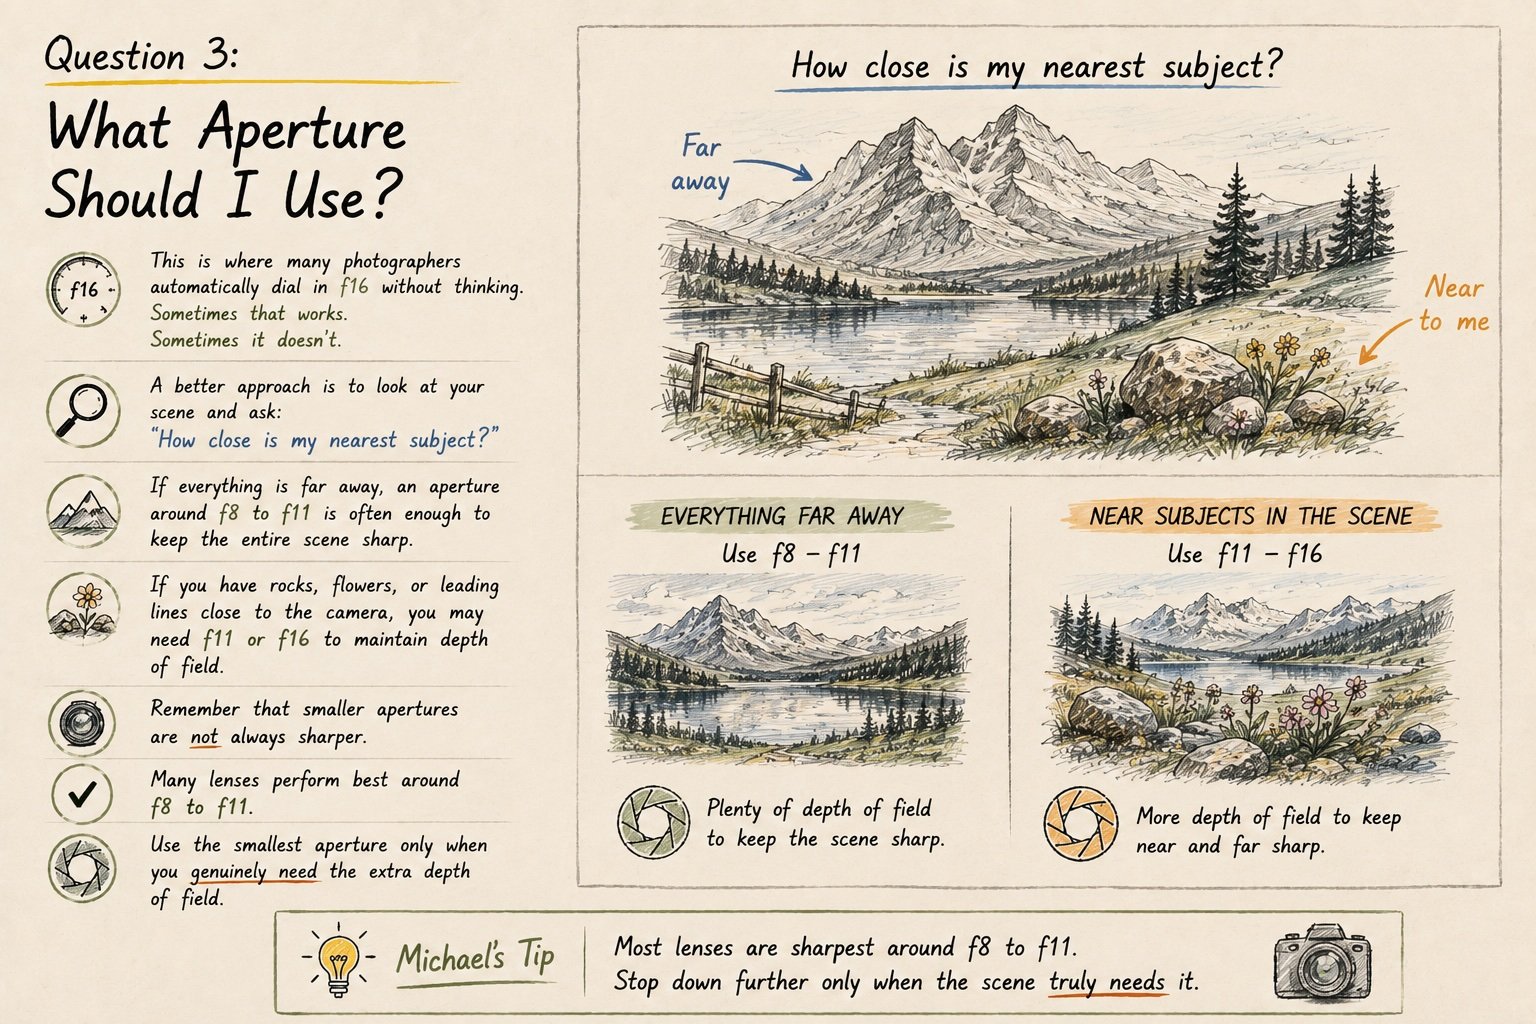
Question 3: What Aperture Should I Use?
This is where many photographers automatically dial in f16 without thinking.
Sometimes that works.
Sometimes it doesn’t.
A better approach is to look at your scene and ask:
“How close is my nearest subject?”
If everything is far away, an aperture around f8 to f11 is often enough to keep the entire scene sharp.
If you have rocks, flowers, or leading lines close to the camera, you may need f11 or f16 to maintain depth of field.
Remember that smaller apertures are not always sharper.
Many lenses perform best around f8 to f11.
Use the smallest aperture only when you genuinely need the extra depth of field.
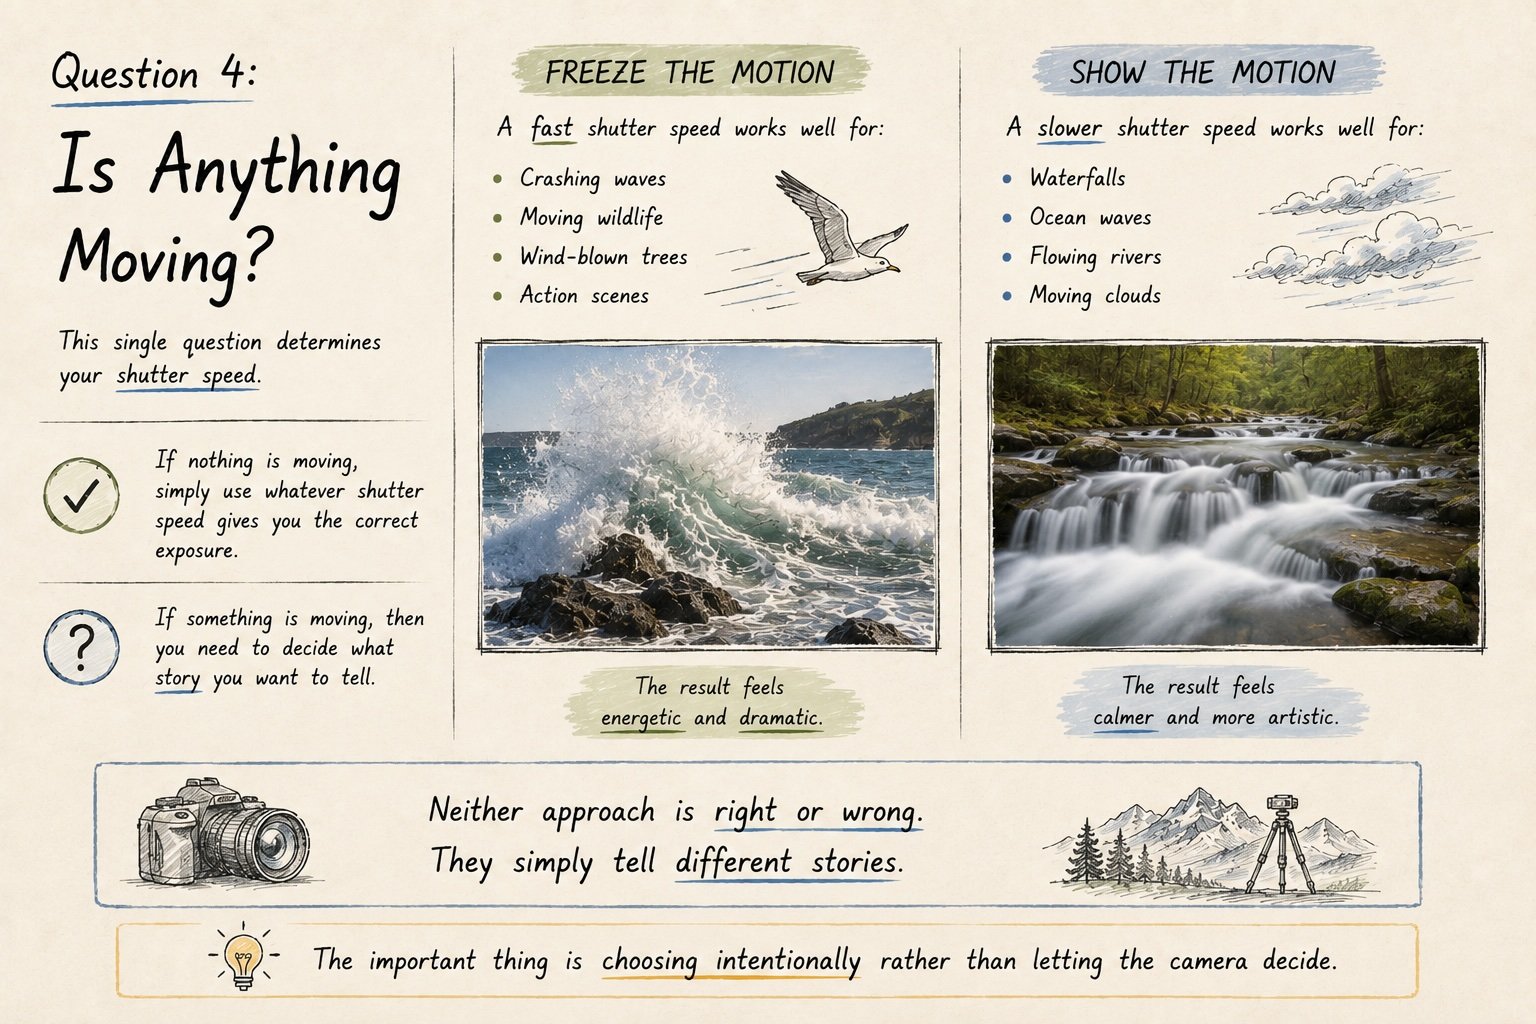
Question 4: Is Anything Moving?
This single question determines your shutter speed.
If nothing is moving, simply use whatever shutter speed gives you the correct exposure.
If something is moving, then you need to decide what story you want to tell.
Freeze the Motion
A fast shutter speed works well for:
-
Crashing waves
-
Moving wildlife
-
Wind-blown trees
-
Action scenes
The result feels energetic and dramatic.
Show the Motion
A slower shutter speed works well for:
-
Waterfalls
-
Ocean waves
-
Flowing rivers
-
Moving clouds
The result feels calmer and more artistic.
Neither approach is right or wrong.
They simply tell different stories.
The important thing is choosing intentionally rather than letting the camera decide.
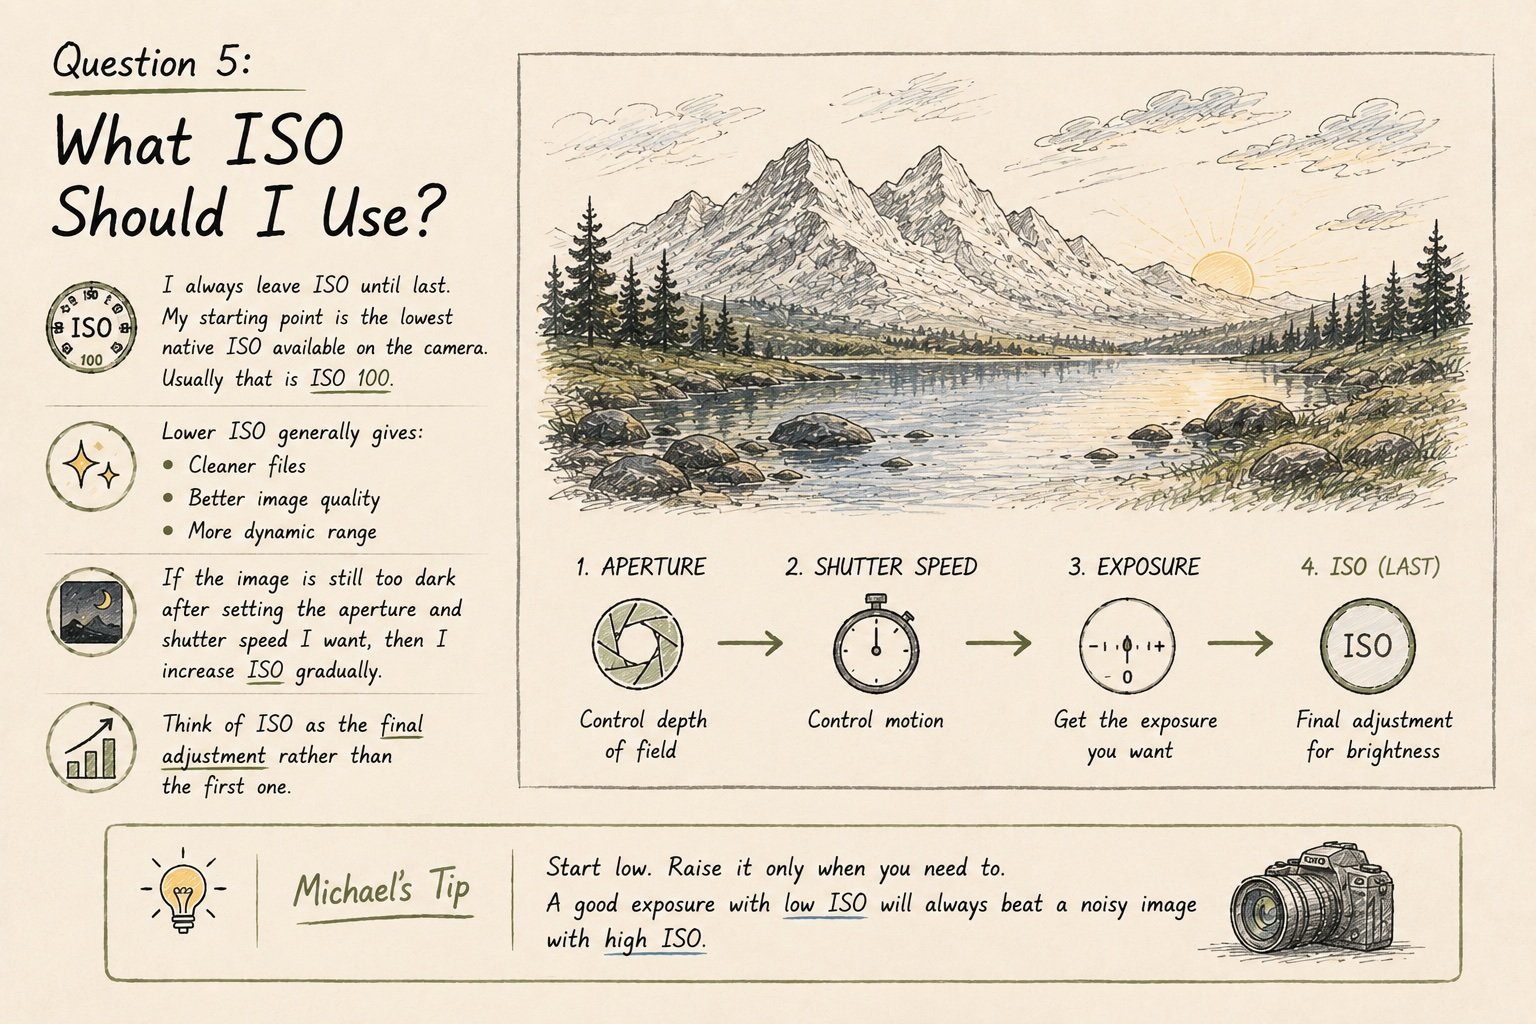
Question 5: What ISO Should I Use?
I always leave ISO until last.
My starting point is the lowest native ISO available on the camera.
Usually that is ISO 100.
Lower ISO generally gives:
-
Cleaner files
-
Better image quality
-
More dynamic range
If the image is still too dark after setting the aperture and shutter speed I want, then I increase ISO gradually.
Think of ISO as the final adjustment rather than the first one.
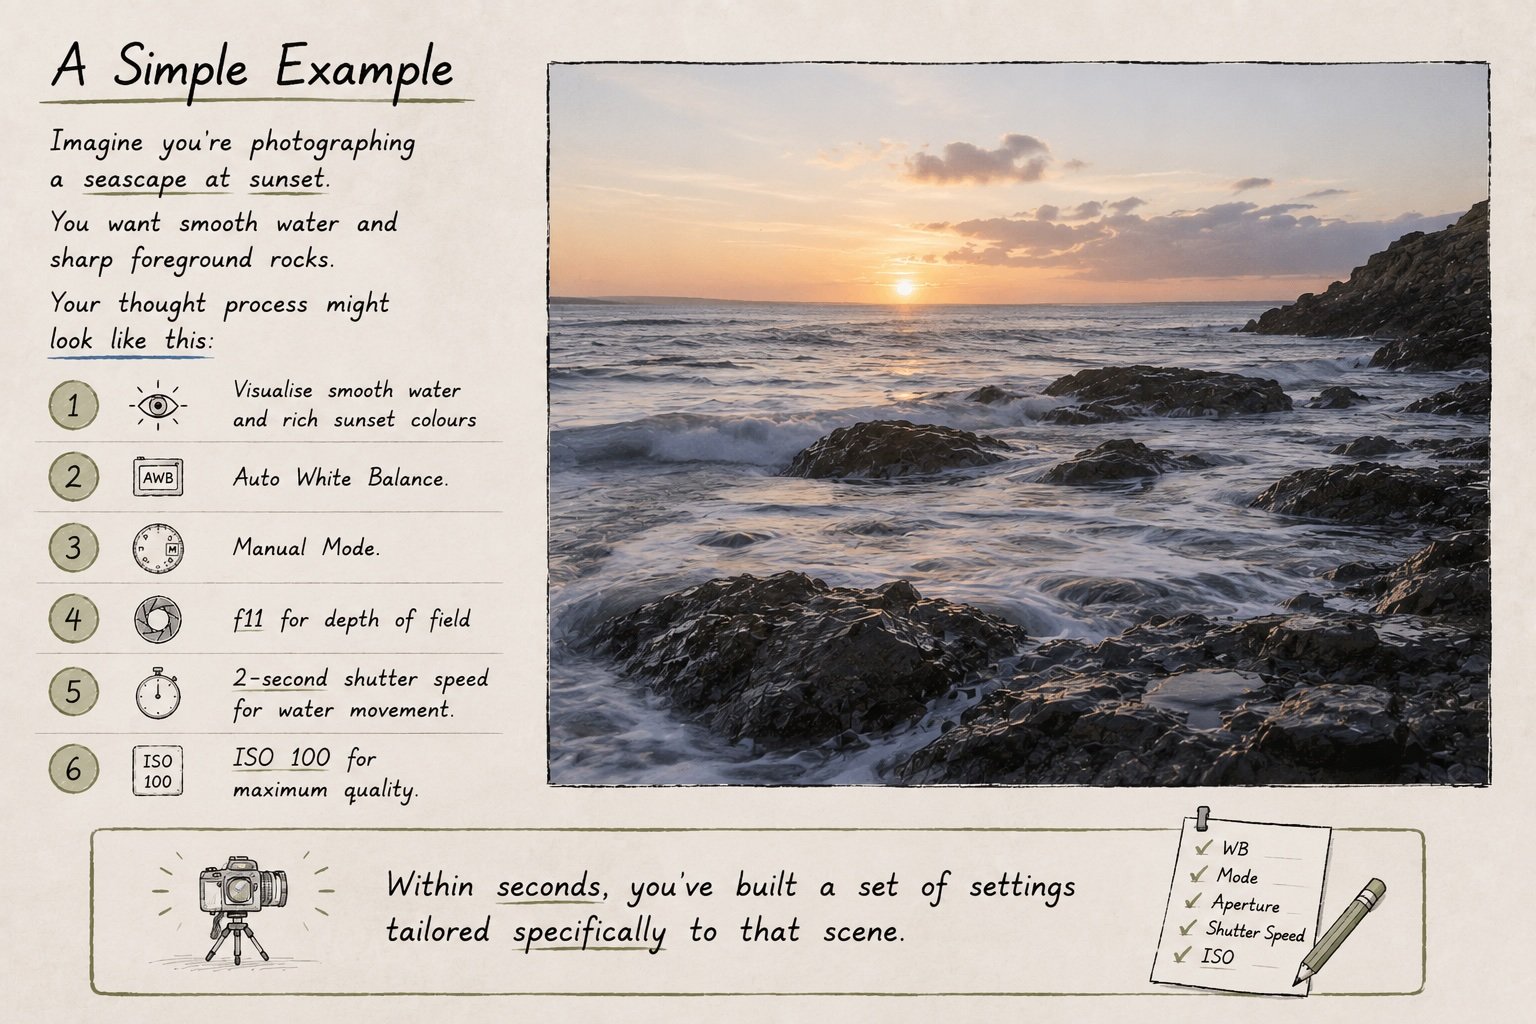
A Simple Example
Imagine you’re photographing a seascape at sunset.
You want smooth water and sharp foreground rocks.
Your thought process might look like this:
-
Visualise smooth water and rich sunset colours
-
Auto White Balance
-
Manual Mode
-
f11 for depth of field
-
2-second shutter speed for water movement
-
ISO 100 for maximum quality
Within seconds, you’ve built a set of settings tailored specifically to that scene.
The Biggest Mistake Photographers Make
Many photographers search for magic settings.
They want someone to tell them:
“Use f16, ISO 100 and 1 second.”
Unfortunately photography doesn’t work that way.
The best settings depend on:
-
The light
-
The subject
-
The weather
-
The composition
-
The story you want to tell
Learning to think through those variables is far more valuable than memorising numbers.
Final Thoughts
The next time you’re standing behind your tripod, don’t ask:
“What settings should I use?”
Ask:
“What am I trying to create?”
Once you answer that question, the settings become much easier to choose.
The camera records the scene.
You decide how the scene should feel.
Enjoyed this article?
Join over 1000 photographers who receive Michael's Lens every week.
Get photography tips, outing invitations, editing tutorials and behind-the-scenes stories straight to your inbox.