
The best light rarely waits for us.
One moment, the sky is quiet. A minute later, sunlight slips through a gap in the clouds and touches the landscape. The colours deepen, the shadows move, and suddenly the scene comes alive.
That is the worst possible time to be searching through a camera menu.
Before I take my first landscape photograph, I want my camera ready. My aim isn’t technical perfection. It is to remove small decisions, so I can give more attention to the light, composition and timing.
This is the camera setup I use as a starting point. It won’t suit every photographer or every scene, but it gives me a simple and reliable way to begin.
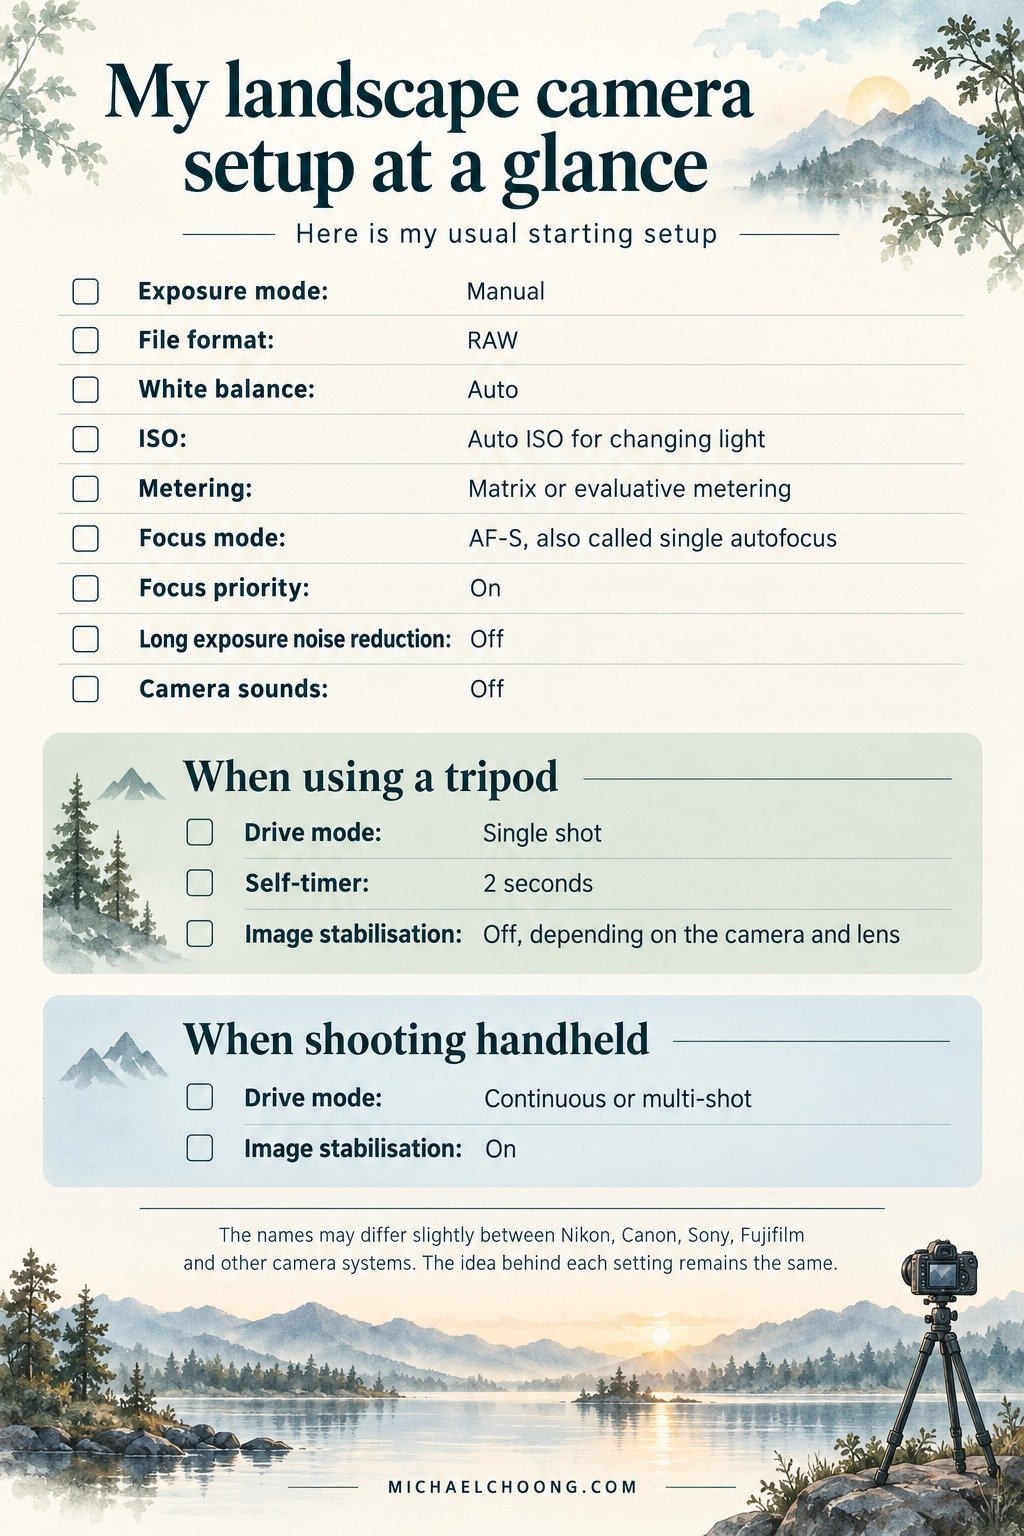
My landscape camera setup at a glance
Here is my usual starting setup:
-
Exposure mode: Manual
-
File format: RAW
-
White balance: Auto
-
ISO: Auto ISO for changing light
-
Metering: Matrix or evaluative metering
-
Focus mode: AF-S, also called single autofocus
-
Focus priority: On
-
Long exposure noise reduction: Off
-
Camera sounds: Off
When using a tripod:
-
Drive mode: Single shot
-
Self-timer: 2 seconds
-
Image stabilisation: Off, depending on the camera and lens
When shooting handheld:
-
Drive mode: Continuous or multi-shot
-
Image stabilisation: On
The names may differ slightly between Nikon, Canon, Sony, Fujifilm and other camera systems. The idea behind each setting remains the same.
Start with the choices that change the photograph
I normally shoot landscapes in Manual mode because I want direct control over the two settings that shape the image most clearly, aperture and shutter speed.
The aperture controls depth of field. It decides how much of the scene appears acceptably sharp, from the foreground to the distance.
The shutter speed controls movement. It can freeze leaves blowing in the wind, soften flowing water, stretch clouds across the sky or turn waves into mist.
These are creative decisions. I don’t want the camera changing them without me noticing.
Before pressing the shutter, I ask two simple questions.
-
How much depth do I need?
-
How do I want movement to appear?
Once I answer those, I can choose the aperture and shutter speed with a clear purpose.
Why I photograph in RAW
I always use RAW for landscape photography.
A landscape can contain a bright sky, dark rocks and small changes of colour in the same frame. A RAW file keeps far more of that information than a JPEG. It gives me greater room to recover highlights, open shadows and refine colour later in Lightroom.
RAW won’t rescue careless exposure, but it gives me the best file to work with when the light is difficult.
The trade-off is simple. RAW files are larger and need editing. For me, the extra flexibility is easily worth it.
Why I leave white balance on Auto
I usually keep white balance on Auto.
Because I photograph in RAW, white balance is not permanently baked into the file. I can adjust it later without harming image quality.
This saves one more decision in the field. I would rather watch the warm edge of sunrise moving across a mountain than worry about whether the camera is set to Daylight or Cloudy.
Auto white balance is only a starting point. During editing, I still decide whether the photograph should feel warm, cool, calm or dramatic. The final colour should support the mood I experienced, not simply copy what the camera selected.
Auto ISO is a support setting, not the creative choice
This is the setting that may surprise some landscape photographers.
When the light is changing quickly, I often use Auto ISO with Manual mode. I choose the aperture and shutter speed, then allow the camera to adjust ISO to reach the exposure.
This doesn’t mean I am giving up control. I have already made the creative decisions. Auto ISO simply reacts to the amount of light available.
If the photograph looks too bright or too dark, exposure compensation lets me adjust it quickly without changing the aperture or shutter speed I chose.
For example, imagine I am photographing soft waves at the coast. I want a shutter speed of 1/4 second to show movement, and f/11 to keep the foreground and horizon sharp. As the light fades, Auto ISO can respond while those two choices remain unchanged.
There is one important exception. When the camera is firmly on a tripod and I am making a deliberate long exposure, especially with ND filters, I often prefer a fixed low ISO such as ISO 64 or 100. In that situation, I have time to build the exposure carefully and usually want the cleanest file possible.
A simple and reliable focusing setup
Sharpness is not the only thing that makes a good landscape photograph, but poor focus can spoil an otherwise beautiful moment.
For still landscapes, I normally use AF-S, or single autofocus. The camera focuses once and holds that focus rather than trying to follow movement that is not there.
I also use focus priority. This tells the camera to prioritise confirmed focus before taking the photograph.
My preferred method is back-button focus. It separates focusing from the shutter button, so pressing the shutter does not accidentally refocus the scene. Once focus is set, it stays where I placed it.
That said, modern mirrorless autofocus is extremely dependable. Using the shutter button to focus also works well for most landscapes. Back-button focus is helpful, but it is not a rule everyone must follow.
The more important point is to know where the camera is focusing. Don’t let it choose a random branch, rock or patch of contrast simply because it is easy to detect.
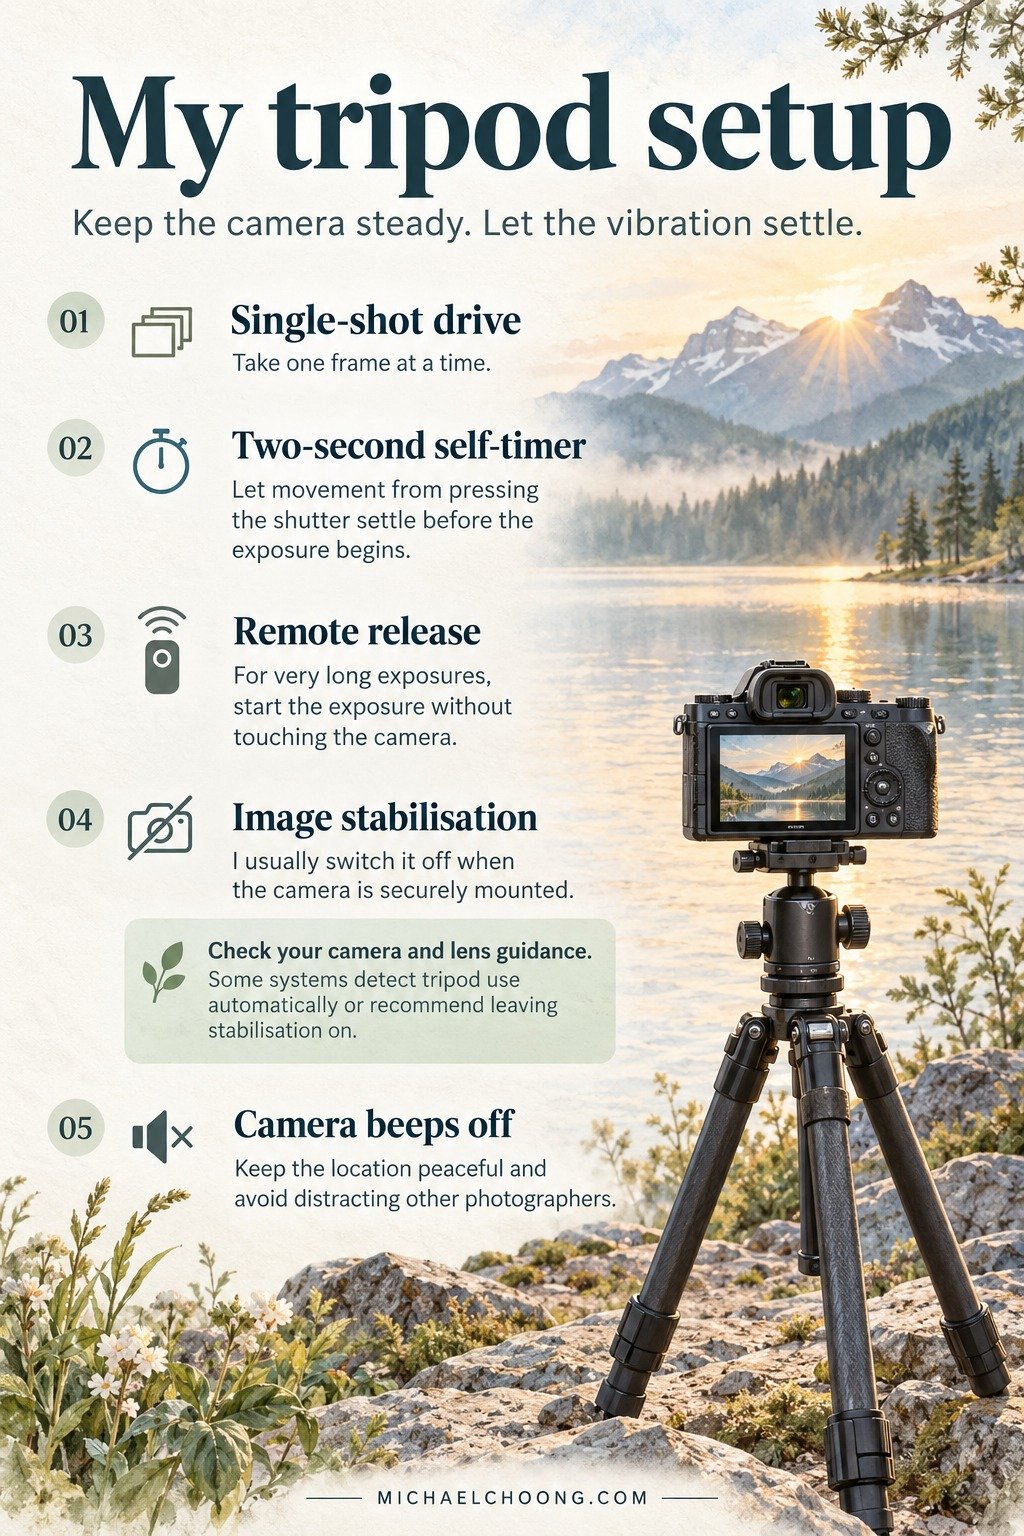
My tripod setup
When the camera goes on a tripod, my aim is to remove vibration.
I switch to single-shot drive mode and use a two-second self-timer. That short delay allows any movement from pressing the shutter button to settle before the exposure begins.
For very long exposures, a remote release can be even better. It lets me start the exposure without touching the camera.
I usually switch image stabilisation off when the camera is securely mounted. Stabilisation is designed to correct movement, and some systems can introduce tiny shifts when there is no movement to correct.
However, newer cameras and lenses may detect tripod use automatically. Some manufacturers also advise leaving stabilisation on in certain situations. Check the guidance for your own camera and lens rather than treating this as a universal rule.
I also turn camera beeps off. A quiet camera causes less distraction at a peaceful location and is more considerate when other photographers are working nearby.
My handheld setup
Handheld photography needs a different balance. Now, speed and stability matter more.
I switch image stabilisation on and use continuous or multi-shot drive mode. A short burst gives me a better chance of capturing one perfectly steady frame, especially when the light is low or I am standing in wind.
This does not mean holding down the shutter and hoping for the best. I still pause, breathe, steady my body and press the shutter gently. The extra frames are simply a small layer of protection.
I also watch my shutter speed carefully. If moving leaves, people or wildlife are part of the scene, stabilisation can reduce camera shake, but it cannot freeze the subject itself. Only a faster shutter speed can do that.
Why I turn long exposure noise reduction off
Long exposure noise reduction can work well, but it makes the camera take a second dark exposure after the photograph. A 30-second image may therefore keep the camera busy for another 30 seconds.
During fast-changing light, that waiting time can cost me the next photograph.
I normally leave the setting off and handle noise or hot pixels later during editing. This keeps the camera ready while the sky is still changing.
For extremely long exposures or demanding night work, you may prefer to turn it on or make separate dark frames. The right choice depends on the scene and how much time you have.
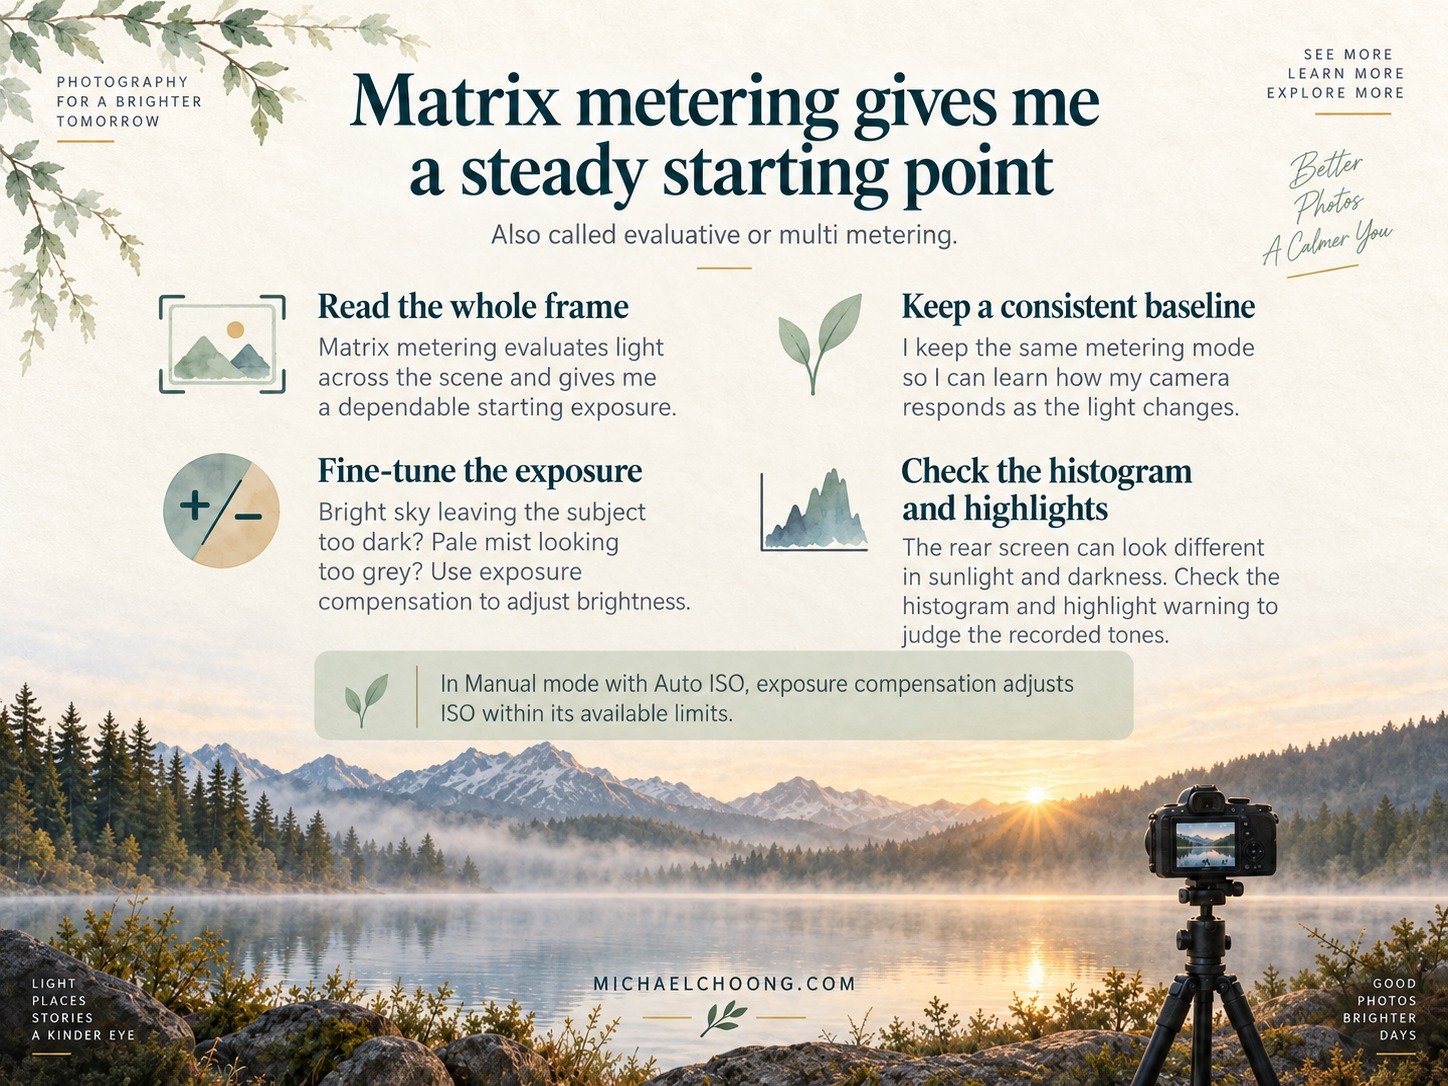
Matrix metering gives me a steady starting point
I use matrix metering, sometimes called evaluative or multi metering. It reads light across the whole frame and gives me a dependable baseline.
I don’t keep changing metering modes whenever the scene changes. Consistency helps me understand how my camera behaves.
If the bright sky is causing the subject to become too dark, or pale mist is being rendered too grey, I use exposure compensation to move the exposure brighter or darker. I also check the histogram and highlight warning rather than trusting the rear screen alone.
The screen can look very different under bright sun or in darkness. The histogram gives me a more reliable view of how the tones have been recorded.
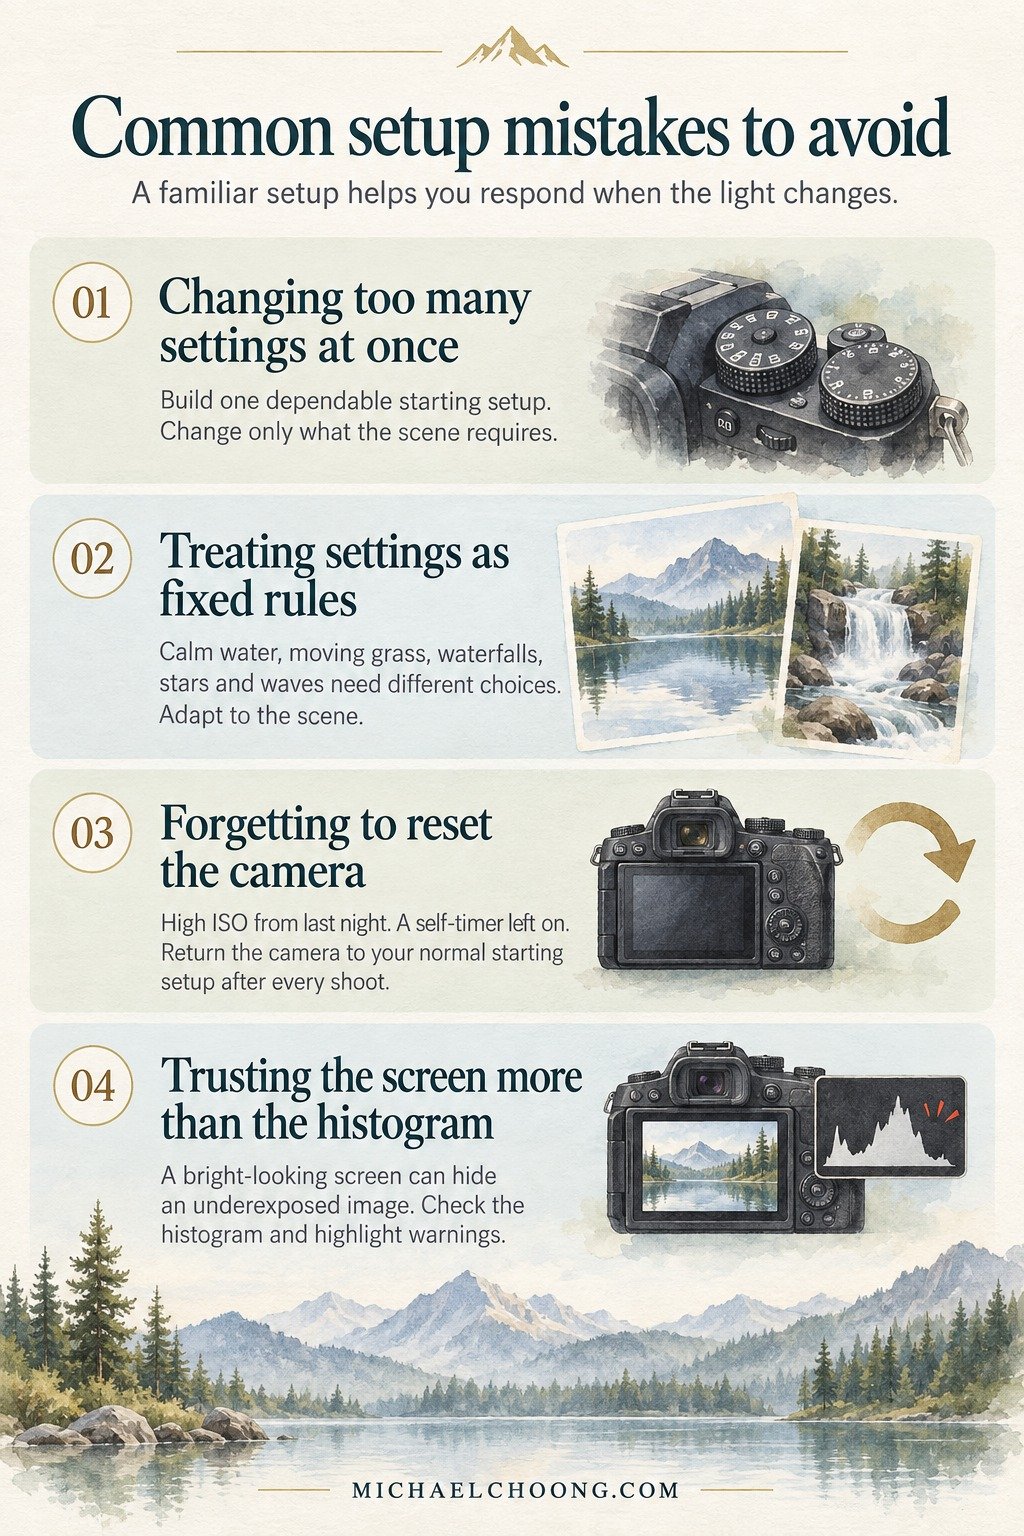
Common setup mistakes to avoid
Changing too many settings at once
If every photograph uses a different focus mode, metering pattern and drive mode, it becomes difficult to learn how the camera behaves. Build one dependable starting setup, then change only what the scene requires.
Treating settings as fixed rules
There is no single best setting for every landscape. Calm water, moving grass, waterfalls, stars and waves all need different choices. A starting setup should make you faster, not make you rigid.
Forgetting to reset the camera
This catches almost everyone eventually. You finish a night shoot at a high ISO, then use the same setting at sunrise without noticing. Or you leave the self-timer on and miss a quick moment.
At the end of each shoot, I return the camera to my normal starting point. It takes less than a minute and makes the next outing much smoother.
Trusting the screen more than the histogram
A photograph may look bright on the rear screen at night but still be underexposed. Check the histogram and highlight warnings, especially when the light is difficult.
The setting that matters most isn’t in the menu
Good preparation helps, but settings do not create a strong photograph by themselves.
Once the camera is ready, I can stop thinking about buttons and begin paying attention to the scene. Where is the light falling? What is distracting from the subject? Is the wind creating movement? Will waiting another minute improve the balance?
That is the real purpose of this setup.
It is not about handing control to the camera. It is about removing friction from decisions I already understand, so the camera becomes an extension of how I see.
Before your next landscape outing, set up the camera at home. Learn where each important control is, save a custom setup if your camera allows it, then reset everything to your preferred starting point.
When the light finally arrives, you will be ready to photograph it.
Frequently asked questions
What is the best camera mode for landscape photography?
Manual mode gives you direct control over aperture and shutter speed, which shape depth of field and movement. Aperture Priority is also a good choice when the light is steady and shutter speed is less important.
Should I use Auto ISO for landscapes?
Auto ISO is useful when light changes quickly and you need to protect a chosen aperture and shutter speed. For careful tripod work and long exposures, a fixed low ISO often gives you more predictable control.
Should image stabilisation be off on a tripod?
I normally switch it off on a solid tripod, but camera and lens systems differ. Some newer systems detect a tripod automatically. Check the manufacturer’s advice for your equipment.
What aperture should I use for landscape photography?
There is no single correct aperture. Around f/8 to f/11 is a useful starting range for many scenes, but the right choice depends on depth, foreground distance, lens performance and the look you want.
Is back-button focus necessary for landscapes?
No. It gives you separate control over focusing and taking the photograph, but modern shutter-button autofocus also works very well. Use the method that helps you focus accurately and consistently.
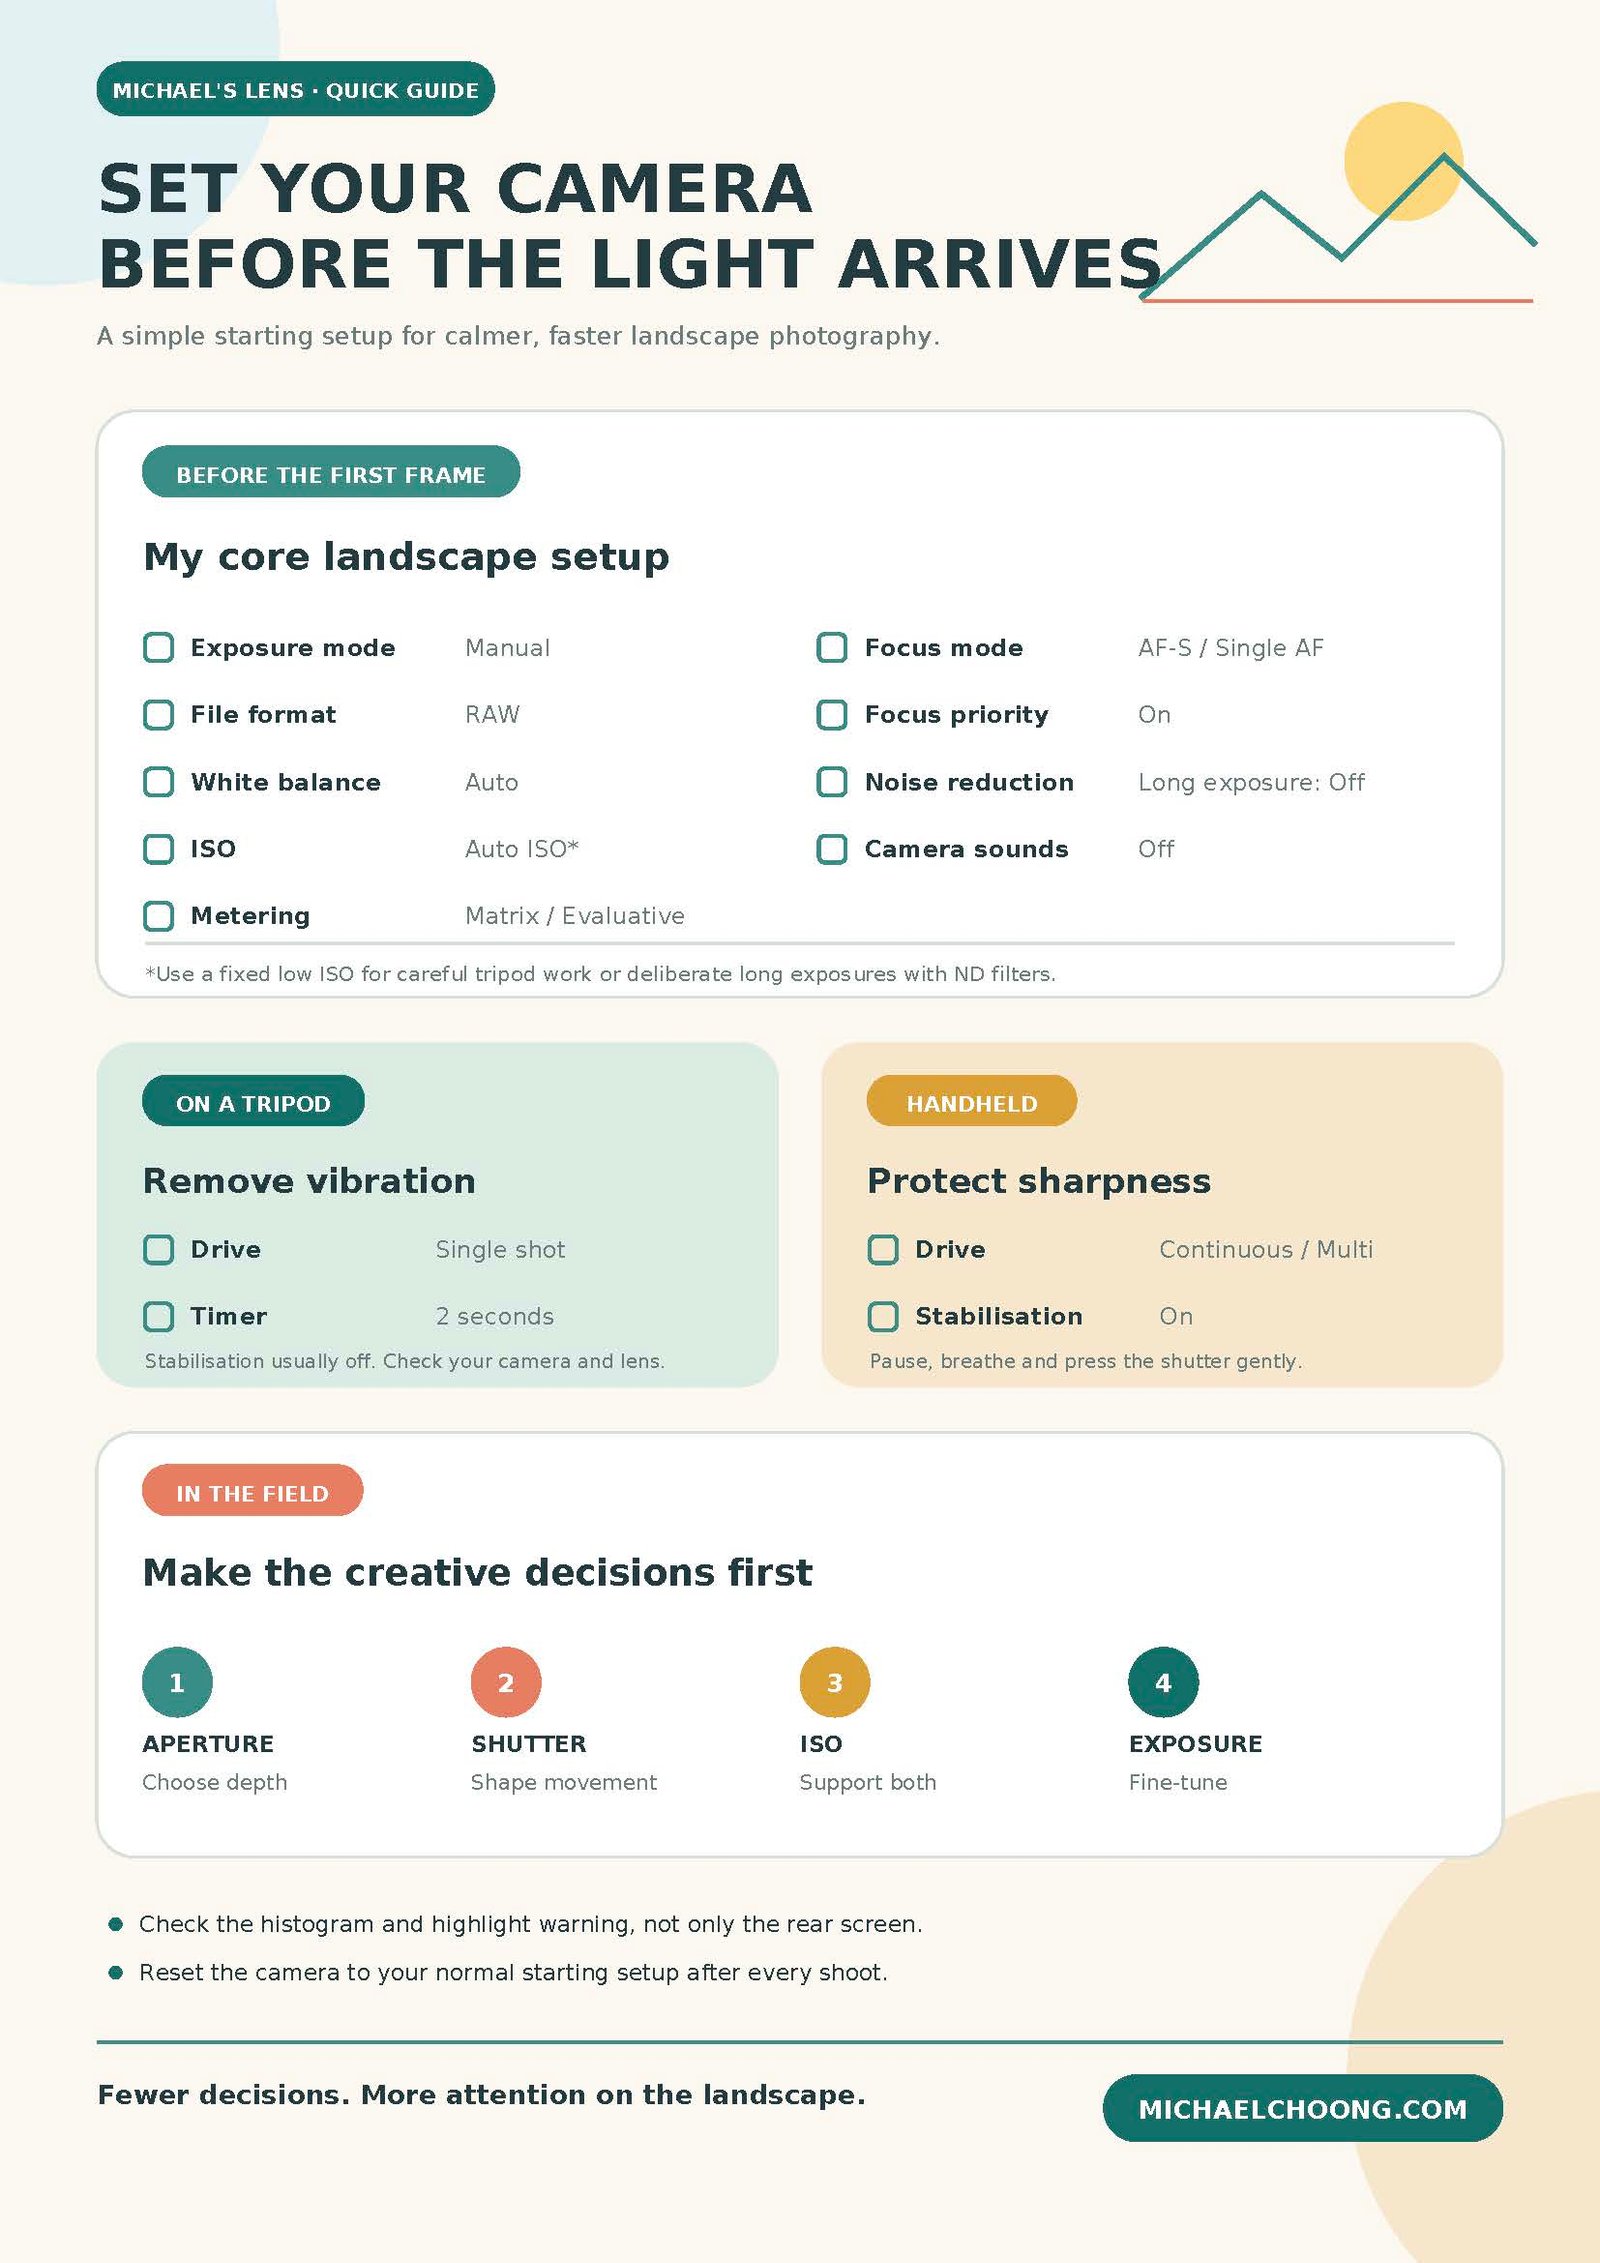
Click here to download the quick guide. Save it on your phone or keep a printed copy in your camera bag for your next landscape shoot.
What is the one camera setting you always check before a landscape shoot? Share it in the comments. If you found this useful, subscribe to Michael’s Lens for weekly photography ideas, field lessons and practical tips.
